Photo Dragon wings - Fantasy

Unleashing the Mythical: Dragon Wings Take Flight

Dragon wings have long been a source of fascination and intrigue in popular culture and media. From ancient mythology to modern-day movies, these majestic appendages have captured the imaginations of people around the world. The allure of dragon wings lies not only in their fantastical appearance but also in the symbolism they represent. In this article, we will explore the mythical origins of dragon wings, their evolving depictions in art and literature, their unique anatomy and function, as well as their symbolic meaning and role in popular culture.

Key Takeaways

  • Dragon wings have fascinated people for centuries, inspiring art, literature, and popular culture.
  • The origins of dragon wings are rooted in mythology, with depictions varying across cultures.
  • Understanding the anatomy of dragon wings can enhance appreciation for their function and design.
  • Dragon wings symbolize power, freedom, and protection, making them a popular choice for tattoos and fashion accessories.
  • Embracing the magic of dragon wings can add a touch of fantasy to your style and inspire creativity.

The Mythical Origins of Dragon Wings

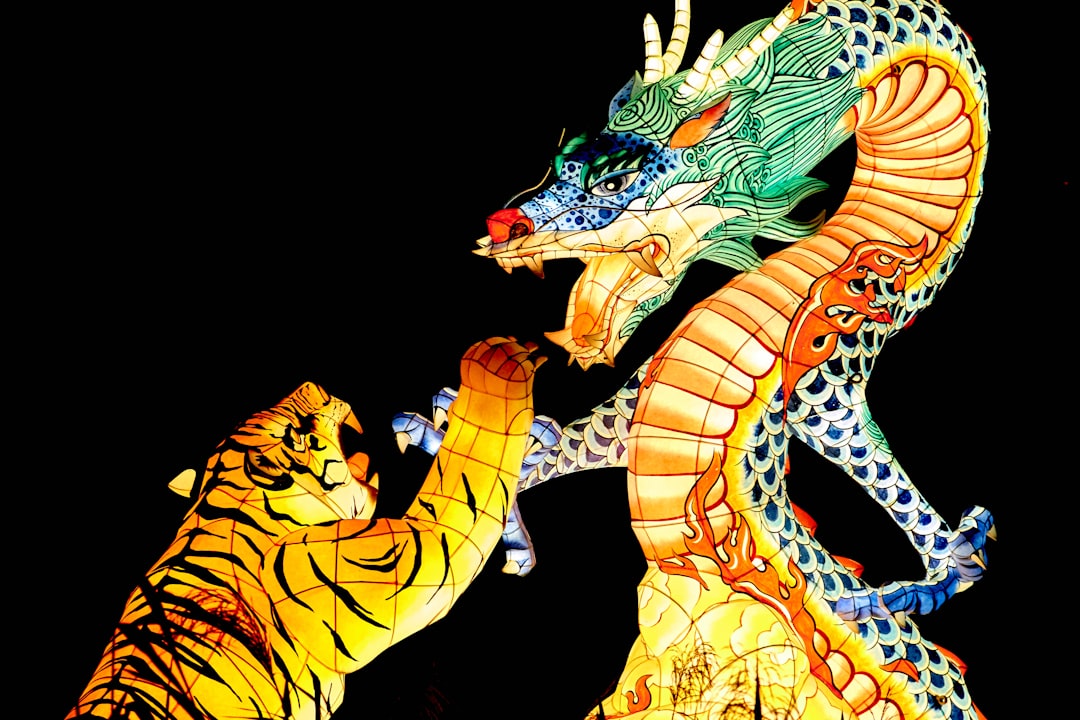
Dragon wings have played a significant role in ancient mythology and folklore across different cultures. In Chinese mythology, dragons are often depicted with wings and are revered as powerful and benevolent creatures. They are believed to bring good luck, prosperity, and protection. In contrast, Western mythology portrays dragons as fearsome and destructive beasts with wings that enable them to fly and wreak havoc on unsuspecting villages.

The cultural interpretations of dragon wings vary greatly. In some cultures, dragon wings symbolize strength, wisdom, and divine power. In others, they represent chaos, danger, and the unknown. Regardless of the interpretation, dragon wings have always held a certain mystique and captivated the human imagination.

The Evolution of Dragon Wing Depictions in Art and Literature

Throughout history, the portrayal of dragon wings in art and literature has evolved alongside cultural shifts and artistic movements. In ancient civilizations such as Egypt and Mesopotamia, dragons were often depicted with bird-like wings, reflecting the belief that birds were messengers of the gods. As art styles changed over time, so did the depiction of dragon wings. In medieval Europe, for example, dragons were often portrayed with bat-like wings, emphasizing their demonic nature.

The influence of different cultures on dragon wing depictions is also evident. In Asian art, dragon wings are often depicted as elegant and graceful, reflecting the cultural reverence for these mythical creatures. In contrast, Western art often portrays dragon wings as fierce and menacing, emphasizing their destructive power. The evolution of dragon wing depictions in art and literature is a testament to the enduring fascination with these mythical creatures.

Anatomy of a Dragon Wing: Understanding the Structure and Function

Aspect Description
Wing Span The distance between the tips of the wings when fully extended.
Wing Shape The curvature and outline of the wing, which affects its aerodynamics.
Wing Bones The bones that make up the wing, including the humerus, radius, ulna, and phalanges.
Wing Muscles The muscles that control the movement of the wing, including the pectoralis, supracoracoideus, and biceps.
Wing Membranes The thin, flexible skin that stretches between the wing bones and allows for flight.
Wing Veins The network of veins that run through the wing membrane, providing structure and support.
Wing Feathers The feathers that cover the wing and help to control its movement and aerodynamics.
Wing Function The role of the wing in flight, including lift, thrust, and maneuverability.

The anatomy of dragon wings differs significantly from that of bird wings. While bird wings are composed of feathers attached to a rigid skeletal structure, dragon wings are typically depicted as leathery membranes stretched between elongated fingers. This unique anatomy allows dragons to have greater maneuverability and control in flight.

The function of dragon wings goes beyond flight. In addition to enabling dragons to soar through the skies, their wings also play a crucial role in combat. Dragon wings can be used to create powerful gusts of wind, knock down enemies, or shield the dragon’s body from attacks. The strength and versatility of dragon wings make them formidable weapons in battle.

Dragon Wing Symbolism: Power, Freedom, and Protection

Dragon wings hold significant symbolic meaning in various cultures and contexts. In many mythologies, dragons are associated with power and strength, and their wings symbolize their ability to transcend earthly limitations. The ability to fly represents freedom and liberation from the constraints of the physical world.

Dragon wings are also often associated with protection. In many cultures, dragons are believed to be guardians or protectors of sacred places or treasures. Their wings serve as a shield, offering protection to those under their watchful gaze.

In popular culture and media, dragon wings continue to represent power, freedom, and protection. They are often depicted as majestic and awe-inspiring, evoking a sense of wonder and enchantment.

The Role of Dragon Wings in Popular Culture and Media

Dragon wings have become a staple in popular culture and media, particularly in movies, TV shows, and video games. From the iconic dragon Smaug in “The Hobbit” to the fire-breathing dragons in “Game of Thrones,” these mythical creatures with their majestic wings have become synonymous with fantasy and magic.

In these mediums, dragon wings are used to enhance the fantastical elements of the story. They add a sense of grandeur and awe, transporting viewers and players into a world of imagination and wonder. Whether it’s the graceful flight of a dragon soaring through the clouds or the powerful gusts of wind created by their wings, dragon wings play a crucial role in creating a sense of awe and wonder in popular culture.

Dragon Wing Cosplay and Fashion: Bringing the Myth to Life

The popularity of dragon wing cosplay has soared in recent years, as fans seek to bring the mythical creature to life. Cosplayers create elaborate costumes complete with intricately designed dragon wings, allowing them to embody the power and mystique of these mythical creatures.

Dragon wings have also made their way into fashion and accessories. From dragon wing-inspired dresses to jewelry adorned with wing motifs, these fashion pieces add a touch of fantasy and whimsy to any outfit. Dragon wing accessories can be found in various forms, including earrings, necklaces, and even handbags. They allow individuals to express their love for dragons and embrace the magic they represent.

Dragon Wing Tattoos: Meaning and Designs

Dragon wing tattoos have become increasingly popular as a way for individuals to express their individuality and creativity. These tattoos can hold different meanings depending on the design and placement. Some people choose dragon wing tattoos as a symbol of power and strength, while others see them as a representation of freedom and independence.

The designs of dragon wing tattoos can vary greatly, ranging from intricate and detailed depictions to more minimalist and abstract designs. Some people choose to incorporate other elements such as flames or scales into their tattoo design, further enhancing the symbolism and visual impact.

Dragon Wing Jewelry and Accessories: Adding a Touch of Fantasy to Your Style

Dragon wing jewelry and accessories offer a unique way to incorporate a touch of fantasy into your style. From dragon wing-shaped pendants to cuff bracelets adorned with wing motifs, these accessories can add a whimsical and magical element to any outfit.

Dragon wing jewelry and accessories come in a variety of materials, including sterling silver, gold, and even gemstones. They can be worn as statement pieces or layered with other jewelry for a more subtle look. Whether you’re attending a costume party or simply want to add a touch of fantasy to your everyday style, dragon wing jewelry and accessories are a perfect choice.

Embracing the Magic of Dragon Wings

Dragon wings have captivated the human imagination for centuries, from their mythical origins in ancient folklore to their portrayal in popular culture and media. The allure of dragon wings lies not only in their fantastical appearance but also in the symbolism they represent. They embody power, freedom, and protection, and continue to inspire and captivate people’s imaginations.

Whether it’s through art, literature, cosplay, fashion, or tattoos, dragon wings allow us to embrace the magic and wonder of these mythical creatures. They transport us to a world of fantasy and imagination, where anything is possible. So next time you see a dragon with its majestic wings spread wide, take a moment to appreciate the beauty and enchantment they bring.

If you’re fascinated by the intricate details and craftsmanship of dragon wings, you might also be interested in exploring the world of pattern drafting. Understanding the art of pattern drafting is essential for aspiring designers, as it allows them to bring their creative visions to life. In an article titled “The Art of Pattern Drafting: Essential Supplies for Aspiring Designers,” you can discover the tools and materials necessary to master this skill. From rulers and curves to tracing paper and muslin, this comprehensive guide from Structured Solutions provides valuable insights into the essentials of pattern drafting supplies. To learn more about this topic, check out the article here.

FAQs

What are dragon wings?

Dragon wings are a type of fictional wings that are often depicted in mythology, fantasy literature, and popular culture. They are typically associated with dragons, which are mythical creatures that are often portrayed as large, fire-breathing reptiles.

What do dragon wings look like?

The appearance of dragon wings can vary depending on the depiction. In general, they are large, membranous wings that are attached to the dragon’s body. They may be covered in scales or feathers, and they may have a bat-like or bird-like shape.

How do dragon wings work?

Since dragon wings are fictional, there is no scientific explanation for how they work. However, in many depictions, they are able to generate lift and allow the dragon to fly through the air.

What is the cultural significance of dragon wings?

Dragon wings are often associated with power, strength, and magic. They are a common element in fantasy literature and popular culture, and they have become a symbol of the fantastical and otherworldly.

Can humans have dragon wings?

No, humans cannot have dragon wings since they are a fictional element. However, some people may choose to create costumes or artwork that depict humans with dragon wings.…

Photo Leopard print

Wild and Chic: Animal Patterns for Fashion and Home Décor.

Animal patterns have long been a popular choice in fashion and home décor. From the fierce and bold leopard print to the elegant and timeless zebra stripes, these patterns add a touch of wildness and sophistication to any outfit or living space. Animal patterns are loved for their ability to make a statement and exude confidence. Whether you choose to incorporate them into your wardrobe or use them to decorate your home, animal patterns are sure to turn heads and make a lasting impression.

Animal patterns are all about embracing your wild side and stepping out of your comfort zone. They are daring, bold, and unapologetic. When you wear or display animal patterns, you are making a statement that you are not afraid to stand out and be noticed. These patterns have a certain allure that draws people in and captivates their attention. They add an element of excitement and adventure to any look or space.

Key Takeaways

  • Animal patterns have been a popular fashion and home décor trend for centuries.
  • Leopard, zebra, and snake prints are some of the top animal patterns for fashion.
  • Incorporating animal patterns into your wardrobe can be done through statement pieces or subtle accents.
  • Animal patterns can be used in home décor through bedding, wallpaper, and other accessories.
  • Mixing and matching animal patterns can create a bold and unique look.

The History of Animal Patterns in Fashion and Home Décor

Animal patterns have a rich history that dates back centuries. The use of animal patterns in fashion can be traced back to ancient civilizations such as Egypt, where leopard skins were worn as a symbol of status and power. In the 1920s, animal patterns became popular in the fashion world thanks to designers like Elsa Schiaparelli, who introduced leopard print into her collections.

Over the years, animal patterns have evolved and adapted to the changing trends in fashion and home décor. In the 1960s, animal patterns experienced a resurgence in popularity thanks to designers like Emilio Pucci, who incorporated bold zebra stripes into his designs. In recent years, animal patterns have become a staple in both high-end and fast fashion brands, as well as in home décor.

The Top Animal Patterns for Fashion

There are several animal patterns that have become iconic in the world of fashion. Leopard print is perhaps the most well-known and widely recognized animal pattern. It is known for its bold and fierce appearance, and it can be found on everything from clothing to accessories. Zebra print is another popular choice, known for its striking black and white stripes. Snake print, with its sleek and slithering design, has also gained popularity in recent years.

Each animal pattern has its own unique characteristics that make it stand out. Leopard print is often associated with luxury and glamour, while zebra print is known for its bold and graphic appearance. Snake print, on the other hand, adds a touch of edginess and sophistication to any outfit.

How to Incorporate Animal Patterns into Your Wardrobe

Animal Pattern Description How to Incorporate
Leopard Print A classic print that adds a touch of glamour to any outfit. Pair a leopard print blouse with black skinny jeans and heels for a chic look.
Zebra Print A bold print that adds a graphic element to your outfit. Wear a zebra print skirt with a simple white t-shirt and sneakers for a casual yet stylish look.
Cheetah Print A playful print that adds a fun element to your outfit. Pair a cheetah print dress with ankle boots and a denim jacket for a trendy look.
Snake Print A versatile print that can be dressed up or down. Wear a snake print blouse with a pencil skirt and heels for a sophisticated look or with jeans and sneakers for a casual look.

When it comes to wearing animal patterns, it’s important to do so in a stylish and tasteful way. One key tip is to choose one statement piece and keep the rest of your outfit simple. For example, you could pair a leopard print blouse with black trousers and heels for a chic and sophisticated look. Another tip is to mix animal patterns with neutral colors to create a balanced and cohesive outfit.

It’s also important to consider the occasion when incorporating animal patterns into your wardrobe. While animal patterns can be worn casually, they can also be dressed up for more formal events. For example, a leopard print dress paired with heels and statement jewelry can make a bold and elegant statement at a cocktail party or evening event.

Animal Patterns for Home Décor: From Bedding to Wallpaper

Animal patterns are not just limited to fashion; they can also be incorporated into home décor. From bedding to wallpaper, there are countless ways to add a touch of wildness to your living space. Animal print bedding can instantly transform a bedroom into a luxurious and exotic retreat. Animal print rugs can add warmth and texture to any room, while animal print wallpaper can create a dramatic focal point.

The versatility of animal patterns in home décor is one of their greatest strengths. They can be used in small doses as accent pieces or as the main focal point of a room. Whether you choose to incorporate animal patterns into your home through furniture, accessories, or textiles, they are sure to add a touch of sophistication and style.

Mixing and Matching Animal Patterns for a Bold Look

For those who are feeling particularly daring, mixing and matching different animal patterns can create a bold and eye-catching look. The key to successfully mixing animal patterns is to choose patterns that have similar color palettes or scales. For example, you could pair a leopard print top with a zebra print skirt, or mix snake print shoes with a cheetah print handbag.

When mixing animal patterns, it’s important to maintain balance and restraint. Too many patterns can overwhelm the eye and create a chaotic look. To avoid this, choose one pattern to be the focal point and keep the rest of your outfit or space relatively neutral. This will allow the animal patterns to shine without overpowering the overall look.

Animal Print Accessories: From Handbags to Jewelry

If you’re not quite ready to fully embrace animal patterns in your wardrobe or home décor, accessories are a great way to dip your toes into the trend. Animal print accessories can add a touch of wildness and sophistication to any outfit. From handbags to jewelry, there are countless options available in the market.

Animal print handbags are a popular choice for those looking to make a statement. They can instantly elevate any outfit and add a touch of glamour. Animal print scarves are another versatile accessory that can be worn in multiple ways, from around the neck to tied on a handbag. Animal print shoes and belts are also popular choices for those looking to add a subtle touch of wildness to their look.

The Psychology of Animal Patterns: What They Say About You

Animal patterns have long been associated with certain personality traits and characteristics. Leopard print, for example, is often associated with confidence, power, and sensuality. Zebra print is seen as bold and adventurous, while snake print is often associated with mystery and seduction.

The choice to wear or display animal patterns can say a lot about a person’s personality. Those who gravitate towards animal patterns are often seen as confident, daring, and unafraid to stand out. They are not afraid to take risks and embrace their wild side.

The Ethics of Wearing Animal Patterns

While animal patterns can be a stylish and fashionable choice, it’s important to consider the ethical implications of wearing them. Many animal patterns are created using synthetic materials that mimic the appearance of real animal fur or skin. However, there are still some animal patterns that are made using real fur or skins.

It’s important to choose animal patterns that are sourced and manufactured responsibly. Look for brands that use faux fur or skins that are made from sustainable materials. Additionally, consider supporting brands that are committed to ethical practices and do not use real animal fur or skins in their products.

Embrace Your Wild Side with Animal Patterns

In conclusion, animal patterns are a bold and daring choice in both fashion and home décor. They have a rich history and have evolved over time to become iconic symbols of style and sophistication. Whether you choose to incorporate animal patterns into your wardrobe or use them to decorate your home, they are sure to make a statement and add a touch of wildness to your life.

When wearing or displaying animal patterns, it’s important to do so in a stylish and tasteful way. Choose one statement piece and keep the rest of your outfit or space relatively neutral to maintain balance and restraint. Consider mixing and matching different animal patterns for a bold look, but remember to choose patterns that have similar color palettes or scales.

Lastly, it’s important to consider the ethical implications of wearing animal patterns. Choose brands that use faux fur or skins made from sustainable materials, and support brands that are committed to ethical practices. By embracing your wild side with animal patterns, you can make a stylish statement while also being conscious of the impact your choices have on the environment and animal welfare.

If you’re fascinated by animal patterns and want to learn more about the art of pattern drafting, you won’t want to miss this insightful article on “The Art of Pattern Drafting: Essential Supplies for Aspiring Designers.” This comprehensive guide by Structured Solutions provides valuable information on the tools and materials necessary for creating stunning animal-inspired patterns. From measuring techniques to organization tips, this article covers it all. Check it out here to take your animal pattern designs to the next level.

FAQs

What are animal patterns?

Animal patterns refer to the distinctive markings or designs found on the skin, fur, feathers, or scales of various animals. These patterns can serve as a form of camouflage, warning signals, or simply as a way to attract mates.

What are some common animal patterns?

Some common animal patterns include stripes, spots, dots, chevrons, scales, and patches. These patterns can be found on a wide range of animals, from big cats like tigers and leopards to birds like peacocks and pheasants.

How do animals use their patterns?

Animals use their patterns in a variety of ways. Some use them as camouflage to blend in with their surroundings and avoid predators, while others use them as warning signals to deter predators or as a way to communicate with other members of their species.

What is the purpose of animal patterns?

The purpose of animal patterns varies depending on the species and the environment in which they live. Some patterns help animals blend in with their surroundings, while others serve as a warning to predators or as a way to attract mates.

Can animal patterns change over time?

Yes, some animals can change their patterns over time. For example, some species of fish can change the color and pattern of their scales to blend in with their surroundings, while some species of birds can molt and grow new feathers with different patterns.

Are animal patterns unique to each individual?

In some cases, animal patterns can be unique to each individual. For example, the spots on a leopard’s fur are unique to that particular leopard and can be used to identify it. However, in other cases, patterns may be more common among members of a species.…

Photo sewing supplies

DIY Pattern Weights: Simplify Your Sewing

Pattern weights are small, often heavy objects that are used in sewing to hold down patterns and fabric while cutting. They serve as an alternative to using pins, which can sometimes distort the fabric or leave holes. DIY pattern weights are a great option for sewists because they are easy to make, customizable, and can be more efficient than using pins.

Key Takeaways

  • DIY pattern weights are a simple and affordable tool for sewing projects.
  • Using pattern weights instead of pins can save time and prevent fabric distortion.
  • Materials needed for DIY pattern weights include fabric, filling, and basic sewing supplies.
  • Making your own pattern weights is easy with a step-by-step guide and creative decorating ideas.
  • Choosing the right fabric for your pattern weights can add personality and functionality to your sewing space.

Benefits of Using Pattern Weights

Using pattern weights instead of pins has several advantages. First, pattern weights can improve accuracy and speed in sewing projects. When using pins, it can be difficult to keep the fabric and pattern in place, resulting in inaccurate cuts. Pattern weights hold everything securely in place, ensuring that the fabric and pattern stay aligned.

Additionally, pattern weights are especially beneficial for those with physical limitations or disabilities. Pinning can be challenging for individuals with arthritis or limited dexterity. Pattern weights eliminate the need for pinning, making the cutting process more accessible and enjoyable for everyone.

Materials Required for DIY Pattern Weights

To make your own pattern weights, you will need a few materials and tools. The most important material is something heavy that will hold down the fabric and pattern effectively. Some popular options include metal washers, fishing weights, or even small bags filled with rice or sand.

In addition to the weight material, you will also need fabric to cover the weights. Cotton or linen fabrics work well because they are durable and easy to work with. You will also need a sewing machine, thread, scissors, and a measuring tape.

Step-by-Step Guide to Making Your Own Pattern Weights

Materials Needed Cost
Scrap fabric 0 (if using scraps)
Rice or beans 2-5 (depending on quantity)
Thread 2-5 (depending on brand)
Needle 1-3 (depending on type)
Scissors 5-10 (depending on brand)
Total Cost 10-23
Time Required 30-60 minutes
Instructions Follow the step-by-step guide provided

1. Cut your fabric into squares or circles that are large enough to cover your weight material.
2. Place two pieces of fabric right sides together and sew around the edges, leaving a small opening.
3. Turn the fabric right side out through the opening.
4. Fill the fabric pouch with your weight material. If using rice or sand, make sure to fill the pouch tightly.
5. Hand stitch the opening closed or use a sewing machine to close it neatly.
6. Repeat these steps for as many pattern weights as you need.

Tips for avoiding common mistakes:
– Make sure to use a strong thread that can withstand the weight and pressure.
– Double-check the size of your fabric squares or circles to ensure they are large enough to cover the weight material.
– Take your time when filling the fabric pouches to ensure they are filled evenly and tightly.

Tips for Choosing the Right Fabric for Your Pattern Weights

The fabric you choose for your pattern weights can make a difference in their durability and effectiveness. It’s important to choose a fabric that is sturdy and can withstand the weight and pressure of holding down fabric and patterns.

Cotton and linen fabrics are popular choices because they are strong, durable, and easy to work with. They also come in a wide variety of colors and patterns, allowing you to personalize your pattern weights. Avoid using fabrics that are too thin or stretchy, as they may not hold up well over time.

Creative Ideas for Decorating Your Pattern Weights

Making your own pattern weights allows you to add personal touches and creativity to your sewing tools. Here are some ideas for decorating your pattern weights:

– Use fabric scraps: If you have leftover fabric from other sewing projects, consider using them to cover your pattern weights. This is a great way to use up small pieces of fabric and create a cohesive look in your sewing space.

– Embellishments: Add buttons, ribbons, or other embellishments to your pattern weights for a unique touch. You can sew them on or use fabric glue for a no-sew option.

– Embroidery: If you enjoy embroidery, consider adding small designs or monograms to your pattern weights. This adds a personal touch and makes them even more special.

How to Store and Organize Your Pattern Weights

Keeping your pattern weights organized and easily accessible is important for a smooth sewing experience. Here are some ideas for storing and organizing your pattern weights:

– Magnetic board: Attach small magnets to the back of your pattern weights and hang them on a magnetic board. This keeps them visible and easily accessible.

– Storage container: Use a small box or container to store your pattern weights. You can separate them by size or color to keep things organized.

– Hanging organizer: Sew a small fabric organizer with pockets to hang on the wall or the back of a door. This allows you to store your pattern weights neatly and keep them within reach.

Using Pattern Weights in Different Sewing Projects

Pattern weights can be used in various types of sewing projects, from garment making to quilting. Here are some examples of how pattern weights can be used:

– Garment making: When cutting out patterns for garments, pattern weights can hold the fabric and pattern in place, ensuring accurate cuts and preventing shifting.

– Quilting: Pattern weights are useful when cutting out fabric pieces for quilting projects. They can hold down multiple layers of fabric, making it easier to cut through all the layers at once.

– Bag making: Pattern weights can be used when cutting out fabric pieces for bags or purses. They help keep the fabric stable, allowing for precise cuts and accurate sewing.

Tips for adapting to different fabrics or patterns:
– For delicate fabrics, use lighter weight materials as pattern weights to avoid damaging the fabric.
– When working with slippery fabrics, consider using double-sided tape or adhesive spray in addition to pattern weights to keep everything in place.

Frequently Asked Questions about DIY Pattern Weights

Q: Can I use any type of weight material?
A: While there are many options for weight materials, it’s important to choose something that is heavy enough to hold down the fabric and pattern effectively. Metal washers, fishing weights, or small bags filled with rice or sand are popular choices.

Q: How many pattern weights do I need?
A: The number of pattern weights you need will depend on the size of your projects and personal preference. It’s a good idea to have at least four or five pattern weights to start with, but you can always make more if needed.

Q: Can I wash my fabric-covered pattern weights?
A: It’s best to spot clean fabric-covered pattern weights to avoid damaging the weight material inside. If necessary, you can hand wash them gently and air dry.

Simplify Your Sewing with DIY Pattern Weights

DIY pattern weights are a great addition to any sewing toolkit. They offer several benefits over using pins, including improved accuracy and speed in sewing projects. Making your own pattern weights allows you to customize them to your liking and add personal touches.

By following the step-by-step guide and tips provided, you can easily make your own pattern weights and enjoy a more efficient and enjoyable sewing experience. So why not give DIY pattern weights a try and see how they can simplify your sewing projects?

If you’re interested in DIY pattern weights, you might also find this article on pattern drafting supplies from Structured Solutions helpful. It provides essential information on the tools and materials needed for pattern drafting. From measuring tools to cutting implements, this article covers everything you need to know to create accurate and professional patterns. Check it out here.

FAQs

What are DIY pattern weights?

DIY pattern weights are small, heavy objects used to hold down pattern paper or fabric while cutting out patterns. They are an alternative to using pins, which can leave holes in delicate fabrics.

What materials can be used to make DIY pattern weights?

DIY pattern weights can be made from a variety of materials, including washers, coins, glass beads, and even rocks. The most important thing is that they are heavy enough to hold down the pattern paper or fabric.

How do you make DIY pattern weights?

To make DIY pattern weights, you will need a heavy object, such as a washer or glass bead, and some fabric scraps. Cut the fabric into small squares, place the heavy object in the center, and then fold the fabric over the object and sew it closed.

What are the benefits of using DIY pattern weights?

Using DIY pattern weights can make cutting out patterns faster and more accurate. They also eliminate the need for pins, which can be time-consuming and leave holes in delicate fabrics.

Can DIY pattern weights be used for other sewing projects?

Yes, DIY pattern weights can be used for a variety of sewing projects, such as holding down fabric while sewing seams or attaching buttons. They are a versatile tool that can be used in many different ways.…

Photo sewing machine

Perfectly Finished Seams: A Sewing Guide

Seam finishing is an essential part of any sewing project. It refers to the process of enclosing or securing the raw edges of a seam to prevent fraying and give the garment a clean and professional finish. Seam finishing not only enhances the durability of the garment but also improves its overall appearance.

In this blog post, we will explore the importance of seam finishing in sewing projects and discuss various types of seam finishes and when to use them. We will also provide step-by-step instructions for basic seam finishing techniques, tips for achieving professional-looking seams, and considerations for sewing with different fabrics. Additionally, we will troubleshoot common seam finishing problems and explore ways to embellish seams for a decorative touch. Finally, we will discuss the essential tools and equipment needed for seam finishing and provide tips for maintaining and caring for them.

Key Takeaways

  • Perfectly finished seams are essential for achieving a professional-looking garment.
  • There are various types of seam finishes, each suited for different fabrics and purposes.
  • Basic techniques for seam finishing include zigzag stitching, overcasting, and binding.
  • Tips for achieving professional-looking seams include using the right needle and thread, and pressing the seams properly.
  • When sewing with different fabrics, it’s important to consider the appropriate seam finishing technique to prevent fraying and unraveling.

Understanding the Importance of Seam Finishing

Seam finishing is not just a cosmetic step in sewing; it has several benefits that contribute to the overall quality and longevity of a garment. Firstly, it prevents the fabric from fraying, which can lead to unraveling and deterioration over time. By enclosing or securing the raw edges of a seam, you ensure that the fabric remains intact and doesn’t fray.

Secondly, seam finishing improves the appearance of the garment. A well-finished seam gives a polished and professional look to the inside of the garment, making it look as good on the inside as it does on the outside. This attention to detail adds value to your sewing projects and sets them apart from store-bought garments.

On the other hand, poorly finished seams can have negative consequences. They can lead to fraying, which not only compromises the durability of the garment but also creates an untidy and unprofessional appearance. Poorly finished seams can also cause discomfort when worn, as rough edges can irritate the skin.

Types of Seam Finishes and When to Use Them

There are various types of seam finishes, each suitable for different fabrics and sewing projects. Some common types of seam finishes include zigzag stitch, overlock stitch, and French seam.

The zigzag stitch is a versatile seam finish that can be used on a wide range of fabrics. It is particularly useful for preventing fraying on woven fabrics. The zigzag stitch creates a zigzag pattern along the raw edge of the fabric, securing it and preventing fraying.

The overlock stitch, also known as a serged edge, is commonly used on knit fabrics. It not only prevents fraying but also provides a clean and professional finish. The overlock stitch is created using a serger machine, which trims the fabric edge while simultaneously stitching it.

The French seam is a more advanced seam finishing technique that is ideal for lightweight and delicate fabrics. It involves enclosing the raw edges of the fabric within the seam itself, resulting in a neat and clean finish on both the inside and outside of the garment.

When choosing a seam finish, consider the fabric type, garment style, and desired level of durability and appearance. For example, if you are working with a lightweight silk fabric for a delicate blouse, a French seam would be the best choice to achieve a clean and elegant finish. On the other hand, if you are sewing activewear made from stretchy knit fabric, an overlock stitch would provide both durability and a professional look.

Basic Techniques for Seam Finishing

Technique Description Pros Cons
Zigzag stitch A back-and-forth stitch that creates a zigzag pattern along the edge of the fabric. Quick and easy to do, works well on stretchy fabrics. May not be as durable as other techniques, can cause fabric to pucker if not done correctly.
French seam A two-step seam that encloses the raw edge of the fabric within the seam itself. Creates a clean and professional finish, works well on lightweight fabrics. Can be time-consuming, may not work well on thicker fabrics.
Bound seam A seam that is finished by encasing the raw edge of the fabric within bias tape or a similar binding material. Creates a neat and tidy finish, works well on fabrics that fray easily. Can be time-consuming, may add bulk to the seam.
Overlock stitch A stitch that sews over the edge of the fabric, enclosing it within a thread casing. Creates a durable and professional finish, works well on a variety of fabrics. Requires a serger or overlock machine, may be difficult to do on curved edges.

Now that we have discussed different types of seam finishes, let’s dive into some basic techniques for achieving perfectly finished seams. These techniques can be used with various types of seam finishes and are suitable for both beginners and experienced sewists.

1. Zigzag Stitch:
– Set your sewing machine to the zigzag stitch setting.
– Sew along the raw edge of the fabric, making sure that the zigzag stitches catch the raw edge.
– Trim any excess fabric close to the zigzag stitches.

2. Overlock Stitch:
– Use a serger machine with the appropriate thread and settings for your fabric.
– Align the raw edge of the fabric with the serger blade and foot.
– Sew along the raw edge, allowing the serger to trim and stitch simultaneously.

3. French Seam:
– With wrong sides together, sew a narrow seam along the raw edge of the fabric.
– Trim the seam allowance to about 1/8 inch.
– Press the seam open and fold the fabric so that right sides are together.
– Sew a second seam, enclosing the raw edges within the seam.

When using these techniques, it is important to have the right tools and equipment. For example, a sewing machine with adjustable stitch settings is necessary for creating zigzag stitches. A serger machine is required for overlock stitches. Additionally, sharp scissors or rotary cutters are essential for trimming fabric edges, and an iron is necessary for pressing seams.

To achieve clean and professional-looking seams, here are some tips to keep in mind:
– Always start with a clean and well-prepared fabric. Remove any loose threads or excess fabric before sewing.
– Take your time and sew slowly, especially when working with delicate fabrics or intricate seam finishes.
– Press your seams after each step to ensure they lay flat and look neat.
– Use quality thread that matches your fabric to ensure durability and a seamless finish.

Tips for Achieving Professional-Looking Seams

While we have discussed some general tips for achieving professional-looking seams in the previous section, let’s delve deeper into common mistakes to avoid when seam finishing and how to troubleshoot common problems that may arise.

One common mistake when seam finishing is not paying attention to seam allowances. Seam allowances refer to the amount of fabric between the stitching line and the raw edge of the fabric. It is important to maintain consistent and even seam allowances throughout your project to ensure a professional finish. Use a seam gauge or ruler to measure and mark your seam allowances before sewing.

Another mistake to avoid is using the wrong needle and thread for your fabric. Different fabrics require different types of needles and threads. For example, lightweight fabrics like silk or chiffon require a fine needle and lightweight thread, while heavyweight fabrics like denim require a stronger needle and thicker thread. Using the wrong needle or thread can result in skipped stitches, broken threads, or puckering.

If you encounter fraying along the raw edges of your seams, it may be due to a few reasons. Firstly, the stitch length may be too long, causing the fabric to fray. Try reducing the stitch length to secure the fabric more effectively. Secondly, the tension on your sewing machine may be too loose. Adjust the tension settings to ensure that the stitches are tight and secure.

Puckering is another common problem that can occur when sewing seams. Puckering refers to the gathering or wrinkling of fabric along the seam line. This can happen if the tension on your sewing machine is too tight or if you are pulling the fabric too tightly as you sew. Adjust the tension settings and sew with a relaxed hand to prevent puckering.

If you encounter any of these problems, don’t panic! Take a step back, assess the issue, and make adjustments as needed. It may take some trial and error to find the right settings and techniques for your specific project, but with practice, you will become more confident in achieving professional-looking seams.

Sewing with Different Fabrics: Seam Finishing Considerations

When it comes to seam finishing, different fabrics require different approaches. Delicate fabrics like silk, chiffon, or lace require extra care and attention to achieve clean and professional-looking seams.

When working with delicate fabrics, it is important to choose a seam finish that will not add bulk or weigh down the fabric. French seams are often the best choice for lightweight fabrics, as they enclose the raw edges within the seam, resulting in a clean and elegant finish. Another option is to use a narrow rolled hem, which creates a delicate and lightweight edge.

When sewing with stretchy fabrics like jersey or spandex, it is important to choose a seam finish that will accommodate the fabric’s stretch. An overlock stitch or a stretch stitch on your sewing machine is ideal for these fabrics, as they provide both durability and flexibility.

In addition to choosing the right seam finish, it is important to select the appropriate needle and thread for your fabric. For delicate fabrics, use a fine needle and lightweight thread to prevent damage or distortion. For stretchy fabrics, use a ballpoint needle and stretch thread to ensure that the seams can withstand the fabric’s stretch.

Troubleshooting Common Seam Finishing Problems

Even with careful attention to detail, seam finishing problems can still occur. Here are some common problems you may encounter when seam finishing and how to troubleshoot them:

1. Skipped Stitches:
– Ensure that you are using the correct needle for your fabric. A dull or bent needle can cause skipped stitches.
– Check that your needle is inserted correctly and securely in the machine.
– Adjust the tension settings on your sewing machine. Skipped stitches can occur if the tension is too tight or too loose.

2. Uneven Tension:
– Check that your sewing machine is threaded correctly. Uneven tension can occur if the thread is not properly threaded through the machine.
– Adjust the tension settings on your sewing machine. If one side of the seam appears tighter or looser than the other, you may need to adjust the tension accordingly.

3. Uneven Seam Allowances:
– Use a seam gauge or ruler to measure and mark your seam allowances before sewing. This will ensure that your seams are consistent and even.
– Sew slowly and carefully, paying attention to the fabric as it feeds through the machine. If you notice that the fabric is shifting or bunching, adjust your sewing speed or use a fabric stabilizer to prevent distortion.

If you are unable to troubleshoot the problem on your own, don’t hesitate to seek professional help. A sewing machine technician or experienced sewist may be able to identify and fix the issue.

Embellishing Seams: Adding a Decorative Touch

Seam finishing doesn’t have to be limited to functional purposes; it can also be an opportunity to add a decorative touch to your sewing projects. Embellishing seams can elevate the overall look of a garment and make it truly unique.

There are various ways to embellish seams, depending on your personal style and the desired effect. Some common techniques include piping, topstitching, and decorative stitches.

Piping involves inserting a narrow strip of fabric or cord between two layers of fabric before sewing the seam. This creates a raised and decorative edge along the seam line. Piping can be used on collars, cuffs, or any other seam where you want to add a pop of color or texture.

Topstitching is another way to embellish seams. It involves stitching along the edge of a seam, either on the right side or wrong side of the fabric, to secure the seam allowance in place and add visual interest. Topstitching can be done with a straight stitch or decorative stitch, depending on the desired effect.

Decorative stitches can also be used to embellish seams. Many modern sewing machines come with built-in decorative stitches that can be used for this purpose. These stitches can add intricate patterns or designs along the seam line, making your garment truly unique.

When choosing an embellishment for your project, consider the fabric type, garment style, and overall aesthetic. For example, if you are sewing a bohemian-style blouse, you may opt for a decorative stitch that adds a whimsical touch to the seams. On the other hand, if you are sewing a tailored jacket, piping along the collar and cuffs can add a sophisticated and polished look.

Seam Finishing Tools and Equipment

To achieve perfectly finished seams, it is important to have the right tools and equipment. Here is an overview of essential tools and equipment for seam finishing:

1. Sewing Machine:
– Choose a sewing machine with adjustable stitch settings to accommodate different types of seam finishes.
– Look for a machine with a built-in overlock stitch or consider investing in a serger machine for more professional-looking finishes.

2. Needles:
– Use the appropriate needle for your fabric type. For example, use a ballpoint needle for knit fabrics and a sharp needle for woven fabrics.
– Replace your needles regularly to ensure clean and precise stitching.

3. Thread:
– Choose thread that matches your fabric in color and weight.
– Consider using specialty threads like polyester or cotton-wrapped polyester for added strength and durability.

4. Scissors or Rotary Cutters:
– Use sharp scissors or rotary cutters to trim fabric edges and thread.
– Invest in quality cutting tools to ensure clean and precise cuts.

5. Seam Gauge or Ruler:
– Use a seam gauge or ruler to measure and mark your seam allowances before sewing.
– This will help you achieve consistent and even seams throughout your project.

6. Iron:
– Pressing your seams is an essential step in achieving professional-looking finishes.
– Use an iron with adjustable heat settings to accommodate different fabric types.

To maintain and care for your tools, follow these tips:
– Clean your sewing machine regularly to remove lint and debris that can affect its performance.
– Oil your sewing machine as recommended by the manufacturer to keep it running smoothly.
– Keep your scissors or rotary cutters sharp by regularly sharpening or replacing the blades.
– Store your tools in a clean and dry environment to prevent rust or damage.

Mastering the Art of Perfectly Finished Seams

Seam finishing is an important step in any sewing project, as it not only enhances the durability of the garment but also improves its overall appearance. By understanding the importance of seam finishing, learning different types of seam finishes, and mastering basic techniques, you can achieve professional-looking seams in your sewing projects.

Remember to choose the appropriate seam finish for your fabric type and garment style, and always use the right tools and equipment for the job. Pay attention to seam allowances, needle and thread selection, and pressing techniques to ensure clean and precise seams.

Don’t be afraid to experiment with different seam finishes and embellishments to add a personal touch to your sewing projects. With practice and attention to detail, you can master the art of perfectly finished seams and take your sewing skills to the next level. So go ahead, start practicing, and enjoy the satisfaction of creating beautifully finished garments!

If you’re looking to perfect your sewing skills, you’ll definitely want to check out this informative article on how to finish a sewing seam. It provides step-by-step instructions and helpful tips to ensure your seams are clean and professional-looking. For more valuable resources on organization and productivity, be sure to explore Structured Solutions’ article on the organization journey. And if you’re interested in connecting with their team or have any questions, don’t hesitate to reach out through their message our team page. Happy sewing!

FAQs

What is a sewing seam?

A sewing seam is the line where two pieces of fabric are joined together by stitching.

Why is it important to finish a sewing seam?

Finishing a sewing seam prevents the fabric from fraying and unraveling over time, which can weaken the seam and cause it to come apart.

What are some common ways to finish a sewing seam?

Some common ways to finish a sewing seam include using a zigzag stitch, overlock stitch, or serger machine. You can also use binding, bias tape, or a French seam.

How do I choose the best finishing method for my sewing project?

The best finishing method for your sewing project will depend on the type of fabric you are using, the type of seam you have sewn, and the overall look you want to achieve. Experiment with different methods on scrap fabric to find the one that works best for your project.

What tools do I need to finish a sewing seam?

You will need a sewing machine or serger machine, thread, and scissors. Depending on the finishing method you choose, you may also need binding, bias tape, or a seam ripper.

Can I finish a sewing seam by hand?

Yes, you can finish a sewing seam by hand using a whip stitch or blanket stitch. This method is often used for delicate fabrics or when a machine is not available.…

Photo Children, capes

DIY Capes for Kids: Easy Patterns to Make Them Feel Like Superheroes

Superhero capes have always been a popular accessory for kids. Whether they are pretending to be their favorite superhero or just engaging in imaginative play, capes can add an extra element of excitement and adventure to a child’s day. While there are many options available for purchasing capes, making your own can be a fun and rewarding project. Not only does it allow you to customize the cape to your child’s preferences, but it also provides an opportunity for creativity and bonding. In this article, we will explore the process of making DIY capes for kids, from choosing the materials to adding personalized touches.

Key Takeaways

  • DIY capes are a fun and easy project for kids.
  • Materials needed include fabric, scissors, thread, and a sewing machine.
  • Simple patterns can be found online or created from scratch.
  • Cutting and sewing the cape requires basic sewing skills.
  • Decorating the cape with superhero symbols adds a personal touch.

Materials Needed for Making Capes

To make a DIY cape for your child, you will need a few basic materials. These include fabric, scissors, thread, and a sewing machine or needle and thread if you prefer hand-sewing. When it comes to choosing the fabric, there are several options available. You can use cotton, satin, fleece, or even old t-shirts or bedsheets. Each type of fabric will give the cape a different look and feel, so consider your child’s preferences and the intended use of the cape when making your selection.

One perplexing tip for choosing the perfect fabric for your child’s cape is to consider their favorite superhero. If they have a specific superhero in mind, try to find fabric that matches their costume. This will not only make the cape more authentic but also add an extra level of excitement for your child. If they don’t have a favorite superhero, consider using fabric in their favorite color or with a pattern that reflects their interests.

Easy Patterns for Making Capes

When it comes to patterns for making capes, there are many options available. You can choose a simple rectangular shape or opt for a more elaborate design with rounded edges or a pointed hood. The key is to choose a pattern that is easy to follow and suits your child’s preferences.

To choose the right pattern for your child, consider their age and size. Younger children may prefer a shorter cape that is easier to move around in, while older children may want a longer cape for a more dramatic effect. Additionally, consider the intended use of the cape. If it will primarily be used for dress-up or playtime, a simpler pattern may be more suitable. However, if your child plans to wear the cape for Halloween or other special occasions, a more elaborate design may be desired.

To create a simple cape pattern, start by measuring your child from their shoulders to the desired length of the cape. Add a few inches for seam allowance and hemming. Then, measure the width of their shoulders and add a few inches for ease of movement. Use these measurements to create a rectangular pattern on paper or cardboard. Cut out the pattern and use it as a template to cut the fabric.

How to Cut and Sew the Cape

Step Description
1 Measure and cut fabric to desired length and width
2 Sew the shoulder seams together
3 Hem the bottom edge of the cape
4 Add a closure, such as a button or clasp, to the front of the cape
5 Optional: Add a hood or embellishments to the cape
6 Try on the cape and make any necessary adjustments

Once you have chosen your fabric and created a pattern, it’s time to cut and sew the cape. Start by laying out your fabric on a flat surface and placing the pattern on top. Use fabric scissors to carefully cut around the pattern, making sure to leave enough room for seam allowance.

When cutting the fabric, it’s important to consider the length of the cape. A bursty tip for making sure the cape is the perfect length for your child is to have them try it on before sewing. This will allow you to make any necessary adjustments before finalizing the length.

After cutting the fabric, it’s time to sew the cape together. If you are using a sewing machine, follow the instructions for threading and stitching. If you prefer hand-sewing, use a needle and thread to sew along the edges of the fabric, leaving an opening at the top for the neck opening.

Decorating the Cape with Superhero Symbols

One of the most exciting parts of making a DIY cape for your child is adding superhero symbols or other decorations. There are many options available when it comes to choosing the right symbol for your child’s cape. You can use fabric paint, iron-on patches, or even sew on appliques.

To choose the right symbol, consider your child’s favorite superhero or their own unique superhero identity. If they have a specific superhero in mind, try to find a symbol that matches their costume. If they don’t have a favorite superhero, consider using their initials or a symbol that represents their interests.

To add the symbol to the cape, start by placing it in the desired location. If using fabric paint, carefully apply the paint using a brush or sponge. If using iron-on patches, follow the instructions for applying them to the fabric. If sewing on appliques, use a needle and thread to carefully stitch around the edges.

Tips for Customizing the Cape for Your Child

While making a DIY cape for your child is already a personalized project, there are additional ways to make it unique to them. Consider adding their name or initials to the cape using fabric paint or iron-on letters. You can also incorporate their favorite color into the design by choosing fabric or decorations in that color.

One perplexing suggestion for customizing the cape is to add a secret pocket. This can be a fun and practical addition that allows your child to store small treasures or special items while wearing their cape. To add a secret pocket, simply sew a small pocket onto the inside of the cape before sewing it together.

Different Styles of Capes for Different Superheroes

Different superheroes have different styles of capes, and you can recreate these styles when making DIY capes for your child. For example, Batman’s cape is often depicted as long and flowing, while Superman’s cape is shorter and more structured.

To create a specific style of cape, start by researching the superhero’s costume and cape design. Look for patterns or tutorials that can guide you in recreating the look. Pay attention to details such as length, shape, and any additional features like hoods or collars. Once you have gathered the necessary materials and information, follow the step-by-step instructions to create the desired style of cape.

Making Capes for Group Play

If you are making capes for a group of children, it’s important to ensure that each child’s cape is unique. This can be achieved by using different colors or patterns of fabric, or by adding personalized touches such as initials or symbols.

A bursty tip for making sure each child’s cape is unique is to involve them in the design process. Ask each child what color or pattern they would like for their cape, and let them choose their own symbol or decoration. This will not only make each cape special but also give the children a sense of ownership and pride in their creation.

To take group play to the next level, consider creating a group superhero identity. This can be done by choosing a theme or symbol that represents the group as a whole. For example, if the children are all friends from a soccer team, they could have capes with a soccer ball symbol. This will not only foster a sense of camaraderie but also make playtime even more exciting.

Safety Precautions to Consider

While making DIY capes for kids can be a fun and creative project, it’s important to consider safety precautions. One important consideration is the length of the cape. Make sure it is not too long that it poses a tripping hazard for your child. Additionally, consider the weight of the fabric and decorations. Avoid using heavy materials that could cause discomfort or restrict movement.

A perplexing suggestion for adding an extra layer of safety is to incorporate reflective material into the cape. This can be done by sewing on reflective tape or using fabric paint that reflects light. This will make your child more visible when playing outside, especially during dusk or nighttime hours.

Conclusion and Inspiration for Your Next DIY Project

In conclusion, making DIY capes for kids can be a fun and rewarding project. By choosing the right materials, patterns, and decorations, you can create a personalized cape that your child will love. Whether they are pretending to be their favorite superhero or engaging in imaginative play, a DIY cape can add an extra element of excitement and adventure to their day.

If you enjoyed making a DIY cape for your child, consider trying other DIY projects as well. There are many options available, from making costumes to creating toys or decorations. The possibilities are endless, and the only limit is your imagination.

As a bursty inspiration, challenge yourself to share your own DIY cape creations with others. Whether it’s through social media or a local community group, sharing your projects can inspire others to get creative and try their hand at making their own capes for kids. So go ahead, unleash your creativity, and have fun making DIY capes for the little superheroes in your life!

If you’re looking for some inspiration for children’s capes patterns, you might want to check out this article on haute couture by Structured Solutions. They delve into the world of high fashion and provide insights into creating unique and stylish designs. For more information on pattern drafting supplies, their article on the essential tools of pattern drafting supply is a great resource. And if you have any questions or need assistance, don’t hesitate to message their team. Happy cape-making! (source)

FAQs

What are children’s capes patterns?

Children’s capes patterns are designs or templates that can be used to create capes for children. These patterns can be used to make capes of different sizes, shapes, and styles.

What materials are needed to make a children’s cape?

The materials needed to make a children’s cape include fabric, thread, scissors, pins, a sewing machine, and any additional embellishments such as buttons or ribbons.

Are children’s capes patterns easy to follow?

Children’s capes patterns can vary in difficulty depending on the design and the skill level of the person making the cape. However, many patterns come with detailed instructions and illustrations to make the process easier.

Can children’s capes patterns be customized?

Yes, children’s capes patterns can be customized to fit the specific needs and preferences of the person making the cape. This can include changing the size, shape, or color of the cape, as well as adding or removing embellishments.

What are some popular designs for children’s capes?

Some popular designs for children’s capes include superhero capes, princess capes, animal capes, and simple hooded capes. However, the possibilities are endless and can be tailored to the child’s interests and imagination.

Where can I find children’s capes patterns?

Children’s capes patterns can be found online through various crafting websites and marketplaces, as well as in craft stores and sewing supply shops. Some patterns may also be available in books or magazines dedicated to sewing and crafting.…

Photo Image: Quilting Supplies

Mastering the Art of Fabric Quilting: A How-To Guide

Fabric quilting is the art of sewing together layers of fabric to create a quilt. Quilts have been a part of human history for centuries, with evidence of quilting dating back to ancient Egypt and China. In today’s society, fabric quilting is not only a practical way to create warm and cozy blankets, but it is also a popular form of artistic expression.

The history of fabric quilting is rich and diverse. It is believed that quilting originated in ancient Egypt, where it was used to create warm clothing and bedding. From there, the art of quilting spread to other parts of the world, including China, India, and Europe. In Europe, quilting became particularly popular during the Middle Ages, with elaborate quilts being created for royalty and nobility.

Today, fabric quilting is enjoyed by people of all ages and backgrounds. It is a versatile craft that allows individuals to express their creativity and create unique and personalized pieces. Quilts are not only functional, but they also serve as works of art that can be displayed and admired.

Key Takeaways

  • Fabric quilting involves sewing together layers of fabric to create a quilted item.
  • Choosing the right fabric for your quilt involves considering factors such as color, pattern, and texture.
  • Essential tools for fabric quilting include a sewing machine, rotary cutter, cutting mat, and quilting ruler.
  • Different types of quilting techniques include hand quilting, machine quilting, and free-motion quilting.
  • Piecing involves sewing together fabric pieces to create quilt blocks, which can be arranged in various patterns to create a quilt top.

Choosing the Right Fabric for Your Quilt: Tips and Tricks

When it comes to choosing fabric for your quilt, there are several factors to consider. First and foremost, you want to choose fabrics that are high quality and durable. Quilts are meant to be used and loved, so it’s important to select fabrics that can withstand regular wear and tear.

Another important factor to consider when choosing fabric is the color and pattern. The fabric you choose will greatly impact the overall look and feel of your quilt, so it’s important to choose fabrics that complement each other and fit with the overall design aesthetic you are going for.

There are many different types of fabric that can be used in quilting, including cotton, flannel, silk, and polyester. Each type of fabric has its own unique characteristics and uses. Cotton is a popular choice for quilting because it is soft, breathable, and easy to work with. Flannel is another popular choice, especially for quilts that are meant to be cozy and warm. Silk is a luxurious fabric that can add a touch of elegance to your quilt, while polyester is a durable and affordable option.

Mixing and matching fabric is a great way to add visual interest to your quilt. When mixing fabrics, it’s important to consider the scale of the patterns and the colors. You want to choose fabrics that have contrasting patterns and colors, but that also work well together. It can be helpful to lay out your fabrics before sewing them together to get a sense of how they will look once they are pieced together.

Essential Tools and Equipment for Fabric Quilting

To get started with fabric quilting, there are a few basic tools that you will need. These include a sewing machine, rotary cutter, cutting mat, ruler, and pins. These tools will help you cut and sew your fabric with precision and accuracy.

For more experienced quilters, there are also advanced tools and equipment that can be used to enhance your quilting experience. These include specialty rulers, templates, and rulers with built-in measurements. These tools can help you create intricate designs and achieve precise piecing.

It’s important to take care of your quilting tools and keep them organized. This will not only make it easier for you to find what you need when you’re working on a project, but it will also help prolong the life of your tools. One tip for maintaining your tools is to clean them regularly. This can be done by wiping them down with a damp cloth or using a cleaning solution specifically designed for sewing tools. Additionally, it’s important to store your tools in a dry and dust-free environment to prevent rusting or damage.

Understanding the Different Types of Quilting Techniques

Quilting Technique Description Pros Cons
Hand Quilting Stitching the layers of the quilt together by hand using a needle and thread. Creates a traditional look and feel. Allows for more control and precision. Can be a relaxing and meditative process. Can be time-consuming. Requires more skill and practice. May cause hand fatigue or strain.
Machine Quilting Stitching the layers of the quilt together using a sewing machine. Can be faster and more efficient. Allows for more complex designs. Can be easier for beginners to learn. May not have the same traditional look and feel. Requires a sewing machine and proper setup. May require more maintenance and repairs.
Free-Motion Quilting Using a sewing machine to create designs and patterns by moving the fabric freely under the needle. Allows for more creativity and customization. Can create unique and intricate designs. Can be a fun and enjoyable process. Requires more skill and practice. May be more difficult to control. May require a special sewing machine foot or attachment.
Longarm Quilting Using a specialized machine to quilt large quilts with a frame and long arm. Can be faster and more efficient for larger quilts. Allows for more complex designs. Can be easier on the body and reduce fatigue. Requires a specialized machine and setup. Can be expensive. May require more maintenance and repairs.

There are several different quilting techniques that can be used to create a quilt. The most common techniques include hand quilting, machine quilting, and longarm quilting.

Hand quilting is the traditional method of quilting and involves stitching the layers of fabric together by hand. This technique requires patience and precision, but it allows for more control over the stitching and can create a beautiful, handmade look.

Machine quilting, on the other hand, involves using a sewing machine to stitch the layers of fabric together. This technique is faster than hand quilting and allows for more intricate designs. Machine quilting can be done using a regular sewing machine or a specialized quilting machine.

Longarm quilting is a technique that involves using a longarm quilting machine to stitch the layers of fabric together. This technique is often used by professional quilters or those who have large quilts to work on. Longarm quilting machines have a larger throat space, which allows for easier maneuverability and the ability to work on larger projects.

When choosing a quilting technique, it’s important to consider your skill level, the size of your project, and the overall look you want to achieve. Hand quilting is a great option for beginners or those who prefer a more traditional look, while machine quilting and longarm quilting are better suited for those with more experience or those who want to create more intricate designs.

Mastering the Art of Piecing: Creating Beautiful Quilt Blocks

Piecing is the process of sewing together individual fabric pieces to create quilt blocks. Quilt blocks are the building blocks of a quilt and can be made up of various shapes and sizes.

To piece quilt blocks, you will need to start by cutting your fabric into the desired shapes and sizes. This can be done using a rotary cutter, cutting mat, and ruler. Once your fabric pieces are cut, you will then sew them together using a sewing machine or by hand.

When piecing quilt blocks, it’s important to be precise and accurate with your measurements and seam allowances. This will ensure that your blocks fit together properly and that your finished quilt is symmetrical and well-constructed.

One tip for achieving precise piecing is to use pins to hold your fabric pieces together before sewing. This will help keep your fabric in place and prevent it from shifting as you sew. Additionally, it can be helpful to press your seams open or to one side to reduce bulk and create a flatter surface.

Common mistakes to avoid when piecing quilt blocks include not measuring accurately, not sewing straight lines, and not pressing your seams properly. Taking the time to measure and cut your fabric accurately, sewing with a steady hand, and pressing your seams flat will greatly improve the overall quality of your quilt blocks.

Tips for Achieving Perfect Quilt Borders and Binding

Borders and binding are an important part of quilting as they help frame the quilt and give it a finished look. Borders are strips of fabric that are sewn around the edges of the quilt top, while binding is the fabric strip that is used to cover the raw edges of the quilt.

When measuring and cutting borders for your quilt, it’s important to take accurate measurements and ensure that your borders are straight and even. One tip for measuring borders is to measure the length of each side of your quilt top and then cut your border strips accordingly. This will help ensure that your borders fit properly and that your quilt top remains square.

There are several different types of binding that can be used in quilting, including single-fold binding, double-fold binding, and bias binding. Single-fold binding is made by folding a strip of fabric in half lengthwise and then sewing it onto the raw edges of the quilt. Double-fold binding is made by folding a strip of fabric in half lengthwise and then folding the raw edges towards the center before sewing it onto the quilt. Bias binding is made by cutting strips of fabric on the bias, which allows for more flexibility and stretch.

To apply binding to your quilt, you will need to sew it onto the raw edges of the quilt using a sewing machine or by hand. It’s important to sew the binding on with precision and accuracy to ensure that it lays flat and looks neat. One tip for achieving a professional-looking binding is to use a walking foot or a binding foot on your sewing machine. These feet help feed the fabric through evenly and prevent it from stretching or puckering.

Adding Personal Touches: Embellishing Your Quilt with Applique and Embroidery

Applique and embroidery are two techniques that can be used to add personal touches and embellishments to your quilt. Applique involves sewing fabric shapes onto the quilt top, while embroidery involves stitching decorative designs onto the fabric.

There are several different applique techniques that can be used in quilting, including raw-edge applique, turned-edge applique, and needle-turn applique. Raw-edge applique involves sewing fabric shapes onto the quilt top without turning under the edges. Turned-edge applique involves turning under the edges of the fabric shapes before sewing them onto the quilt top. Needle-turn applique involves using a needle to turn under the edges of the fabric shapes as you sew them onto the quilt top.

Embroidery can be done by hand or by machine and can be used to create intricate designs and patterns on your quilt. Hand embroidery involves using a needle and thread to stitch designs onto the fabric, while machine embroidery involves using a sewing machine with an embroidery attachment to stitch designs onto the fabric.

When adding embellishments to your quilt, it’s important to choose designs and colors that complement the overall look and feel of your quilt. It can be helpful to sketch out your design before sewing or embroidering it onto the fabric to ensure that it looks the way you want it to.

Tips for Successful Quilting: Machine vs. Hand Quilting

When it comes to quilting, there are two main methods that can be used: machine quilting and hand quilting. Each method has its own pros and cons, and the choice between the two will depend on your personal preferences and the type of quilt you are making.

Machine quilting is a faster and more efficient method of quilting. It allows for more intricate designs and can be done using a regular sewing machine or a specialized quilting machine. Machine quilting is a great option for those who want to create detailed and complex designs, as well as those who have large quilts to work on.

Hand quilting, on the other hand, is a slower and more time-consuming method of quilting. It involves stitching the layers of fabric together by hand using a needle and thread. Hand quilting allows for more control over the stitching and can create a beautiful, handmade look. Hand quilting is a great option for those who enjoy the process of quilting and want to create a quilt with a traditional, vintage feel.

When choosing between machine quilting and hand quilting, it’s important to consider your skill level, the size of your project, and the overall look you want to achieve. Machine quilting is generally easier for beginners and is better suited for larger projects or those with intricate designs. Hand quilting requires more patience and skill, but it allows for more control over the stitching and can create a unique and personalized look.

Caring for Your Quilt: Best Practices for Maintenance and Storage

Once you have completed your quilt, it’s important to take proper care of it to ensure that it lasts for years to come. This includes washing and drying your quilt, as well as storing it properly when it’s not in use.

When washing your quilt, it’s important to follow the care instructions provided by the fabric manufacturer. In general, quilts can be washed in a gentle cycle with mild detergent and cold water. It’s important to avoid using bleach or harsh chemicals, as these can damage the fabric and cause it to fade or deteriorate.

After washing your quilt, it’s important to dry it properly to prevent mold or mildew from forming. Quilts can be air-dried by laying them flat on a clean surface or by hanging them on a clothesline. It’s important to avoid using high heat or direct sunlight to dry your quilt, as this can cause the fabric to shrink or fade.

When storing your quilt, it’s important to keep it in a cool, dry place away from direct sunlight and moisture. Quilts should be folded neatly and stored in a clean, breathable container such as a cotton bag or acid-free box. It’s important to avoid storing quilts in plastic bags or containers, as this can trap moisture and cause mold or mildew to form.

Common mistakes to avoid when caring for your quilt include washing it too frequently, using harsh chemicals or bleach, and storing it in a damp or humid environment. Taking the time to properly care for your quilt will help ensure that it remains in good condition and can be enjoyed for years to come.

Advanced Quilting Techniques: Exploring Creative Design and Color Theory

Once you have mastered the basics of fabric quilting, you may want to explore more advanced techniques that allow for more creative design and color theory. These techniques can help take your quilting to the next level and allow you to create unique and personalized pieces.

One advanced quilting technique is foundation paper piecing. This technique involves sewing fabric pieces onto a foundation paper pattern to create intricate designs and precise piecing. Foundation paper piecing is a great option for those who want to create complex designs or achieve precise piecing.

Another advanced quilting technique is improvisational quilting. This technique involves sewing fabric pieces together without a set pattern or plan, allowing for more freedom and creativity. Improvisational quilting is a great option for those who want to experiment with color and design and create one-of-a-kind pieces.

Color theory is an important aspect of quilting and can greatly impact the overall look and feel of your quilt. Understanding color theory can help you choose fabrics that complement each other and create a harmonious color palette. Some basic principles of color theory include understanding the color wheel, using complementary colors, and considering the value and intensity of colors.

When exploring advanced quilting techniques and color theory, it’s important to take your time and experiment with different techniques and color combinations. It can be helpful to start with small projects or practice pieces before tackling larger, more complex projects. Additionally, it’s important to trust your instincts and have fun with the process. Quilting is a creative and personal art form, so don’t be afraid to take risks and try new things.

In conclusion, fabric quilting is a versatile and rewarding craft that allows individuals to express their creativity and create unique and personalized pieces. By understanding the basics of fabric quilting, choosing the right fabric for your quilt, using the essential tools and equipment, mastering different quilting techniques, achieving precise piecing, creating perfect quilt borders and binding, adding personal touches with applique and embroidery, and experimenting with different quilting designs, individuals can create beautiful and functional quilts that can be cherished for generations. Whether it’s a simple patchwork quilt or a complex art quilt, fabric quilting offers endless possibilities for artistic expression. The process of quilting can be both relaxing and therapeutic, providing a sense of accomplishment and pride in the finished product. Additionally, fabric quilting can also be a social activity, with quilting groups and guilds offering opportunities for collaboration, learning, and sharing of ideas. Overall, fabric quilting is a timeless craft that continues to captivate and inspire people of all ages and skill levels.

If you’re interested in learning how to quilt fabric, you may also find this article on measurements by Structured Solutions helpful. Understanding the proper measurements and dimensions is crucial when it comes to quilting, as it ensures that your finished piece turns out just right. Check out their article here for expert tips and techniques on measuring fabric accurately for your quilting projects.

FAQs

What is quilting?

Quilting is the process of sewing two or more layers of fabric together to create a thicker padded material.

What materials do I need to quilt fabric?

You will need fabric, batting, thread, a sewing machine or needle, and quilting tools such as scissors, rotary cutter, and cutting mat.

What are the different types of quilting?

There are three main types of quilting: hand quilting, machine quilting, and longarm quilting. Hand quilting involves sewing the layers together by hand, while machine quilting uses a sewing machine. Longarm quilting is done using a specialized machine that can handle larger quilts.

What is the process of quilting fabric?

The process of quilting fabric involves cutting the fabric and batting to the desired size, layering them together, and then sewing them together using a quilting stitch. The quilt can then be finished with binding.

What are some tips for quilting fabric?

Some tips for quilting fabric include using high-quality materials, taking your time, practicing your stitching, and using a quilting ruler to ensure accurate cuts.

Can I quilt fabric by hand?

Yes, you can quilt fabric by hand using a needle and thread. Hand quilting can be a time-consuming process, but it can also be very rewarding.

What are some common quilting patterns?

Some common quilting patterns include the log cabin, the nine-patch, the flying geese, and the star pattern. There are many different patterns to choose from, and you can also create your own unique designs.…

Photo Image: Rainy day Nouns: Rain, Hat

Stay Dry in Style with a Rain Hat

Trying to stay fashionable in rainy weather can be a frustrating task. The constant battle to keep your hair and outfit dry can often leave you feeling defeated. However, there is a solution that not only protects you from the rain but also adds a stylish touch to your look – the rain hat. In this article, we will explore the benefits of wearing a rain hat, the fashionable options available, and how it can be the ultimate solution to your rainy day hair woes.

Key Takeaways

  • A rain hat is a stylish and practical accessory for wet weather days.
  • It can protect your hair and face from the rain while keeping you fashionable.
  • A rain hat is the ultimate solution to rainy day hair woes.
  • It is comfortable and chic, making it the perfect accessory for a rainy day.
  • With a rain hat, you can stay dry and look great at the same time.

The Benefits of a Rain Hat

One of the most practical benefits of wearing a rain hat is that it keeps your hair and outfit dry. No more worrying about frizzy hair or ruined clothes when you step out into the rain. A rain hat provides a barrier between you and the rain, ensuring that you stay dry and comfortable throughout the day. This is especially important if you have an important event or meeting to attend and want to look your best.

In addition to keeping you dry, a rain hat also protects you from the elements. Rain can be accompanied by strong winds, which can make it difficult to keep an umbrella in place. A rain hat eliminates this problem by staying securely on your head, providing you with reliable protection from both rain and wind.

The Fashionable Side of Rain Hats

Rain hats are not just practical; they can also be incredibly stylish. There are a wide variety of options available, ranging from classic designs to more modern and trendy styles. Whether you prefer a sleek and minimalist look or something more bold and eye-catching, there is a rain hat out there for everyone.

The versatility of rain hats as an accessory is another reason why they have become so popular in the fashion world. They can be paired with any outfit, adding a touch of sophistication and elegance. From casual jeans and a t-shirt to a formal dress, a rain hat can elevate any look and make a statement.

The Ultimate Solution to Rainy Day Hair Woes

Problem Solution
Frizz Use a smoothing serum or oil to tame flyaways
Flat hair Apply a volumizing mousse or spray to add body
Greasy hair Use a dry shampoo to absorb excess oil
Static Apply a leave-in conditioner or anti-static spray
Wet hair Blow dry with a diffuser attachment or air dry

One of the biggest struggles of rainy weather is maintaining your hair. The humidity and moisture in the air can cause frizz and make your hair look unruly. This is where a rain hat comes in as the ultimate solution. By wearing a rain hat, you can protect your hair from the rain and keep it looking sleek and styled.

A rain hat acts as a shield, preventing raindrops from coming into contact with your hair. This helps to maintain your hairstyle and keep it looking fresh throughout the day. Whether you have straight, curly, or wavy hair, a rain hat can be a game-changer when it comes to rainy day hair woes.

How to Choose the Perfect Rain Hat

When choosing a rain hat, there are a few factors to consider. First and foremost, you want to make sure that it is made from a waterproof material. Look for hats made from materials such as nylon or polyester, as these are known for their water-resistant properties.

Style is another important factor to consider. There are various styles of rain hats available, including wide-brimmed hats, bucket hats, and cloche hats. Choose a style that suits your personal taste and complements your face shape.

Burstiness: The Unexpected Benefits of a Rain Hat

While the primary purpose of a rain hat is to protect you from the rain, it also offers unexpected benefits. One such benefit is providing shade on sunny days. The wide brim of many rain hats can shield your face from the sun’s rays, helping to prevent sunburn and keeping you cool.

Rain hats can also be used as a fashion statement even on dry days. They can add a touch of flair to any outfit and serve as an accessory that sets you apart from the crowd. Whether you choose a brightly colored hat or one with unique embellishments, a rain hat can be a fun and unexpected addition to your wardrobe.

Perplexity: The History of Rain Hats

Rain hats have a long history that dates back centuries. They have evolved over time, adapting to different cultures and climates. In ancient times, rain hats were made from natural materials such as leaves or animal skins. As time went on, they became more sophisticated, with the use of fabrics and waterproof materials.

Rain hats have also played a significant role in different cultures around the world. In some cultures, they are seen as a symbol of status and wealth, while in others, they are worn for practical reasons. The cultural significance of rain hats adds an interesting layer to their history and showcases their importance in various societies.

In conclusion, rain hats are not only a practical solution for staying dry in rainy weather but also a fashionable accessory that can elevate your look. They offer numerous benefits, from keeping your hair and outfit dry to protecting you from the elements. With a wide range of styles and options available, there is a rain hat out there for everyone.

So, the next time you find yourself dreading a rainy day, consider adding a rain hat to your outfit. Not only will it keep you dry and stylish, but it will also provide unexpected benefits such as shade on sunny days. Embrace the versatility and functionality of rain hats and make them a staple in your wardrobe.

If you’re interested in rain hats and want to learn more about the essential tools of pattern drafting supply, check out this informative article from Structured Solutions. They provide valuable insights into the tools and equipment necessary for creating patterns, which can be useful for designing and crafting your own rain hat. Discover the essentials of pattern drafting supplies by clicking here.

FAQs

What is a rain hat?

A rain hat is a type of headgear designed to protect the wearer’s head and face from rain and other precipitation.

What materials are rain hats made of?

Rain hats can be made from a variety of materials, including waterproof fabrics like Gore-Tex, PVC, and nylon.

What are the different types of rain hats?

There are several types of rain hats, including bucket hats, wide-brimmed hats, and hooded hats. Some rain hats also come with a chin strap to keep them in place during windy weather.

Are rain hats only for women?

No, rain hats are not only for women. They are available in a variety of styles and sizes for both men and women.

Can rain hats be worn in all types of weather?

Rain hats are specifically designed for wet weather, but they can also be worn in other types of weather conditions, such as windy or cold weather.

How do I care for my rain hat?

The care instructions for a rain hat will depend on the material it is made from. Generally, rain hats can be wiped clean with a damp cloth and left to air dry. Some hats may also be machine washed on a gentle cycle. It is important to follow the care instructions provided by the manufacturer.…

Photo Fabric pattern

Stylish Cloak Patterns to Elevate Your Wardrobe

Cloaks have a long and storied history in the world of fashion. Dating back to ancient times, cloaks were worn by various cultures for both practical and fashionable purposes. In recent years, there has been a resurgence in the popularity of cloaks, with fashion-forward individuals embracing this timeless garment. In this article, we will explore the allure of cloak fashion, how to incorporate a cloak into your everyday wardrobe, the versatility of cloak patterns, the best fabrics for creating a chic cloak, how to choose the right length and style for your cloak, unique cloak designs to make a statement, the art of layering with a cloak, DIY cloak patterns for a personalized wardrobe, the perfect cloak for every season, and how to accessorize your cloak for a fashion-forward look.

Key Takeaways

  • Cloak fashion is timeless and elegant.
  • Incorporating a cloak into your everyday wardrobe is easy and stylish.
  • Cloak patterns are versatile and can be worn for any occasion.
  • The best fabrics for creating a chic cloak are wool, cashmere, and silk.
  • Choosing the right length and style for your cloak is important for a flattering look.

The Timeless Elegance of Cloak Fashion

Cloaks have always held a certain allure throughout history. From ancient civilizations to medieval times and beyond, cloaks were worn by both men and women as a symbol of status and elegance. In ancient Rome, cloaks were worn by citizens as protection from the elements and as a sign of social standing. During the Middle Ages, cloaks became more elaborate and were often adorned with intricate embroidery and fur trim. In more recent history, cloaks were popularized by iconic figures such as Sherlock Holmes and Dracula, further cementing their place in fashion.

Over time, cloaks have evolved in style and design. While traditional cloaks were typically long and flowing, modern interpretations have introduced shorter lengths and more tailored silhouettes. Today, cloaks can be found in a variety of fabrics and patterns, allowing individuals to express their personal style while still embracing the timeless elegance that cloaks embody.

How to Incorporate a Cloak into Your Everyday Wardrobe

While cloaks may seem like a dramatic statement piece, they can actually be quite versatile when it comes to styling. For a casual everyday look, pair a cloak with jeans and a simple t-shirt. Opt for a shorter cloak in a neutral color to keep the outfit balanced. Add a pair of ankle boots and minimal accessories to complete the look.

When dressing up for a formal occasion, a cloak can add an air of sophistication and glamour. Choose a long cloak in a luxurious fabric such as velvet or silk. Pair it with a sleek dress or tailored suit for a polished and elegant ensemble. Finish off the look with statement jewelry and a pair of heels.

The Versatility of Cloak Patterns for Any Occasion

Cloak Pattern Occasion Versatility Rating
Plaid Casual 9/10
Floral Spring Wedding 8/10
Striped Business Meeting 7/10
Embroidered Formal Event 9/10
Animal Print Wild Night Out 6/10

Cloaks come in a variety of patterns, each with its own unique style and purpose. Some popular patterns include herringbone, plaid, and paisley. Herringbone cloaks are classic and timeless, perfect for adding a touch of sophistication to any outfit. Plaid cloaks, on the other hand, have a more casual and rustic feel, making them ideal for everyday wear. Paisley cloaks are bold and vibrant, adding a pop of color and personality to any ensemble.

When choosing a pattern for your cloak, consider your personal style and the occasion you will be wearing it for. If you prefer a more understated look, opt for a subtle pattern such as herringbone or a solid color. If you want to make a statement, go for a bold pattern like paisley or plaid.

The Best Fabrics for Creating a Chic Cloak

The fabric you choose for your cloak can greatly impact its overall look and feel. Some top fabrics for making a chic cloak include wool, cashmere, velvet, and silk. Wool is a popular choice due to its warmth and durability. Cashmere is known for its luxurious softness and is perfect for creating an elegant cloak. Velvet adds a touch of opulence and is often used for formal occasions. Silk is lightweight and breathable, making it ideal for warmer weather.

When choosing a fabric for your cloak, consider the climate you will be wearing it in and the level of comfort you desire. If you live in a colder climate, opt for a heavier fabric such as wool or cashmere. If you live in a warmer climate, choose a lighter fabric such as silk.

How to Choose the Right Length and Style for Your Cloak

When it comes to choosing the right length for your cloak, there are a few factors to consider. Firstly, think about the purpose of your cloak. If you plan on wearing it for everyday use, a shorter length may be more practical. If you want to make a statement at a formal event, a longer length can add drama and elegance to your look.

In terms of style, there are several options to choose from. A classic cloak typically has a loose and flowing silhouette, while a more modern interpretation may have a more tailored and structured shape. Consider your personal style and the occasion you will be wearing the cloak for when choosing the right style.

Unique Cloak Designs to Make a Statement

If you want to stand out from the crowd, there are plenty of unique cloak designs to choose from. One option is a cape-style cloak, which features armholes and allows for greater freedom of movement. Another option is a hooded cloak, which adds an element of mystery and intrigue to your look. For those who want to make a bold statement, consider a cloak with asymmetrical or exaggerated proportions.

To make a statement with your cloak, keep the rest of your outfit simple and let the cloak take center stage. Pair it with neutral colors and minimal accessories to allow the unique design of the cloak to shine.

The Art of Layering with a Cloak

Layering is an essential skill when it comes to styling a cloak. To achieve a cohesive look, start with a base layer such as a t-shirt or blouse. Add a sweater or jacket for added warmth and texture. Finally, layer your cloak on top for the finishing touch. Play with different lengths and textures to create visual interest and dimension.

When layering with a cloak, it’s important to consider the proportions of each piece. If your cloak is long and voluminous, opt for more fitted layers underneath to balance out the silhouette. If your cloak is shorter and more tailored, you can experiment with looser and bulkier layers.

DIY Cloak Patterns for a Personalized Wardrobe

If you’re feeling crafty, why not try making your own cloak? There are plenty of DIY cloak patterns available online that cater to all skill levels. Whether you’re a beginner or an experienced seamstress, there’s a pattern out there for you.

When choosing a DIY cloak pattern, consider your sewing skills and the style you want to achieve. Some patterns may require more advanced techniques such as sewing in a lining or adding intricate details. If you’re new to sewing, start with a simpler pattern and work your way up as you gain confidence.

The Perfect Cloak for Every Season

Cloaks are not just for the colder months; they can be worn year-round with the right fabric and design. For colder seasons, opt for heavier fabrics such as wool or cashmere to keep warm. Pair your cloak with cozy layers such as sweaters and scarves for added insulation.

In warmer seasons, choose lighter fabrics such as silk or linen to stay cool and comfortable. Opt for shorter lengths and more breathable designs to allow for better airflow. Pair your cloak with lightweight dresses or shorts for a breezy and effortless look.

How to Accessorize Your Cloak for a Fashion-Forward Look

Accessories can elevate any outfit, including a cloak. When accessorizing your cloak, consider the overall style and color palette. For a bohemian-inspired look, add a wide-brimmed hat and a fringe bag. For a more polished and sophisticated look, opt for statement jewelry and a structured handbag.

Belts can also be a great accessory to add definition and shape to your cloak. Choose a belt in a contrasting color or texture to create visual interest. You can also experiment with different types of closures such as brooches or clasps to add a unique touch to your cloak.

Cloaks have stood the test of time and continue to be a fashion-forward choice for those who want to make a statement. With their timeless elegance, versatility, and unique designs, cloaks can be incorporated into any wardrobe. Whether you choose to wear a cloak for everyday casual looks or formal occasions, there are endless possibilities for styling and accessorizing. So why not embrace the allure of cloak fashion and add this timeless garment to your wardrobe?

If you’re interested in learning more about cloak patterns and the essential tools of pattern drafting, you might find this article on “The Essential Tools of Pattern Drafting Supply” from Structured Solutions to be helpful. This article provides valuable insights into the tools needed for pattern drafting, including those specifically relevant to cloak patterns. From measuring tapes to rulers and curve templates, this article covers all the essential supplies aspiring designers need to create their own unique cloak patterns. To read more about it, click here.

FAQs

What is a cloak pattern?

A cloak pattern is a set of instructions or guidelines for creating a cloak, which is a type of loose-fitting outer garment that is typically worn over other clothing.

What materials are typically used to make a cloak?

Cloaks can be made from a variety of materials, including wool, cotton, silk, velvet, and leather. The choice of material will depend on the desired look and function of the cloak.

Are there different types of cloak patterns?

Yes, there are many different types of cloak patterns available, including full-length cloaks, half-cloaks, hooded cloaks, and more. Some patterns may also include additional features such as pockets or decorative trim.

Can beginners use cloak patterns?

Yes, many cloak patterns are designed with beginners in mind and include detailed instructions and illustrations to help guide the sewing process. However, some patterns may be more complex and require more advanced sewing skills.

Where can I find cloak patterns?

Cloak patterns can be found in a variety of places, including online sewing pattern retailers, craft stores, and sewing books. Some patterns may also be available for free online.…

Photo Felted soap: Wool, soap

Felted Soap: The Eco-Friendly Solution for Plastic-Free Bathing

Felted soap is a unique and eco-friendly alternative to traditional soap bars. It is made by wrapping a bar of soap in layers of wool or other natural fibers, which creates a felted covering around the soap. This process not only adds aesthetic appeal to the soap, but also provides numerous benefits for both personal hygiene and the environment. In this article, we will explore the world of felted soap, its benefits, and how it can contribute to plastic-free bathing.

Perplexity and burstiness are two concepts that are often used in the context of language modeling and text analysis. Perplexity refers to the measure of how well a language model predicts a given sequence of words. It is calculated based on the probability distribution of the next word in a sequence given the previous words. Burstiness, on the other hand, refers to the phenomenon where certain words or phrases occur in clusters or bursts within a text. These concepts will be used throughout this article to analyze and discuss the topic of felted soap.

Key Takeaways

  • Felted soap is a bar of soap wrapped in wool fibers that are felted together to create a washcloth-like texture.
  • Using felted soap can reduce plastic waste and packaging waste from traditional soap bars.
  • Different types of felted soap can have unique properties, such as exfoliating or moisturizing.
  • To use felted soap, wet it and rub it between your hands to create a lather, then use it to wash your body.
  • Felted soap can be made at home using soap, wool roving, and hot water.

What is felted soap and how is it made?

Felted soap is essentially a bar of soap that has been wrapped in layers of wool or other natural fibers. The felting process involves wetting the wool, adding soap, and then agitating it until the fibers shrink and interlock together, creating a solid covering around the soap. This process not only adds a decorative element to the soap, but also provides several practical benefits.

To make felted soap, you will need a few materials including a bar of soap, wool roving or yarn, hot water, and a towel. The first step is to wrap the wool tightly around the bar of soap, ensuring that it is completely covered. Next, wet the wool with hot water and gently massage it to create friction. This will cause the fibers to shrink and interlock together. Continue massaging until the wool feels firm and secure around the soap. Finally, rinse the felted soap under cold water to remove any excess soap and squeeze out the excess water. Place it on a towel to dry.

The benefits of using felted soap for plastic-free bathing

Plastic waste is a major environmental concern, with millions of tons of plastic ending up in landfills and oceans each year. Traditional soap bars often come wrapped in plastic packaging, contributing to this waste. Felted soap offers a plastic-free alternative that can help reduce plastic waste.

By using felted soap, you can eliminate the need for plastic packaging. The wool covering acts as a natural and biodegradable packaging material, which can be composted after use. This not only reduces waste but also helps to protect the environment.

In addition to its environmental benefits, felted soap also offers several advantages for personal hygiene. The wool covering acts as a gentle exfoliator, helping to remove dead skin cells and leaving your skin feeling soft and smooth. The fibers also create a rich lather when used with water, ensuring a thorough and luxurious cleansing experience.

How felted soap helps reduce waste and protect the environment

Benefits of Felted Soap Description
Reduces Waste Felted soap eliminates the need for plastic packaging and reduces the amount of soap that goes to waste.
Protects the Environment Felted soap is made from natural materials and does not contain harmful chemicals that can harm the environment.
Long-Lasting Felted soap lasts longer than traditional soap bars, reducing the need for frequent replacements and further reducing waste.
Exfoliating The wool fibers in felted soap provide a gentle exfoliation, removing dead skin cells and leaving skin feeling soft and smooth.
Easy to Use Felted soap is easy to grip and does not slip out of your hands, making it a great option for children and those with mobility issues.

Felted soap is not only a plastic-free alternative to traditional soap bars but also offers several environmental benefits. Unlike liquid soaps that often come in plastic bottles, felted soap eliminates the need for single-use plastic containers.

Traditional soap bars can also contribute to waste when they become too small to use effectively. With felted soap, the wool covering helps to extend the life of the soap by acting as a built-in washcloth. As the soap is used, the wool continues to shrink and interlock, ensuring that no part of the soap goes to waste.

Furthermore, when it comes time to dispose of felted soap, it can be composted along with other organic materials. The wool covering is biodegradable and will break down naturally over time, leaving no harmful residue behind. This makes felted soap a truly sustainable and eco-friendly option for bathing.

The different types of felted soap available and their unique properties

Felted soap comes in a variety of types, each with its own unique properties and benefits. Some common types include:

1. Wool felted soap: This is the most basic and traditional type of felted soap. It is made by wrapping a bar of soap in wool roving and felting it to create a solid covering. Wool felted soap offers gentle exfoliation and a luxurious lather.

2. Silk felted soap: Silk felted soap is made by wrapping a bar of soap in silk fibers before felting it. The silk adds a smooth and silky texture to the soap, making it ideal for those with sensitive skin.

3. Herbal felted soap: Herbal felted soap is infused with dried herbs or flowers, which provide additional benefits for the skin. Different herbs have different properties, such as soothing, moisturizing, or antibacterial effects.

4. Essential oil felted soap: Essential oils are often added to felted soap to provide fragrance and therapeutic benefits. Different essential oils have different properties, such as calming, energizing, or uplifting effects.

When choosing the right type of felted soap for your needs, consider your skin type and any specific concerns you may have. For example, if you have sensitive skin, silk or herbal felted soap may be a good choice. If you enjoy aromatherapy, essential oil felted soap may be the perfect option.

How to use felted soap for maximum effectiveness and longevity

To use felted soap effectively, wet the wool covering and rub it between your hands or on a washcloth to create a lather. The wool will continue to shrink and interlock as you use the soap, ensuring that it stays securely in place. The soap can be used just like any other soap bar, lathering it up and using it to cleanse your body.

To maximize the effectiveness and longevity of felted soap, it is important to allow it to dry between uses. After each use, place the soap on a soap dish or in a well-ventilated area to allow it to air dry. This will help prevent the wool from becoming soggy and ensure that the soap lasts as long as possible.

If you find that the wool covering becomes loose or starts to unravel, you can gently wet it and massage it back into place. The wool will shrink and interlock again, securing the covering around the soap.

The role of essential oils and natural fragrances in felted soap

Essential oils and natural fragrances are often added to felted soap to provide a pleasant scent and additional therapeutic benefits. Essential oils are highly concentrated plant extracts that have been used for centuries for their healing properties.

When choosing a fragrance for your felted soap, consider your personal preferences as well as any specific benefits you are looking for. For example, lavender essential oil is known for its calming and relaxing properties, while citrus oils like lemon or orange can be energizing and uplifting.

It is important to note that some people may have sensitivities or allergies to certain essential oils. If you have sensitive skin or allergies, it is recommended to do a patch test before using a new fragrance. Apply a small amount of the soap to a small area of your skin and wait 24 hours to see if any irritation occurs.

How felted soap can benefit those with sensitive skin or allergies

Felted soap can be particularly beneficial for those with sensitive skin or allergies. Traditional soap bars often contain harsh chemicals and synthetic fragrances that can irritate sensitive skin. Felted soap, on the other hand, is made with natural ingredients and can be customized to suit individual needs.

The wool covering of felted soap provides a gentle exfoliation that helps to remove dead skin cells without causing irritation. The natural fibers also create a rich lather that cleanses the skin without stripping away its natural oils.

Many people with sensitive skin or allergies have found relief by switching to felted soap. Testimonials from individuals who have made the switch often report that their skin feels softer, smoother, and less irritated after using felted soap.

The history of felted soap and its cultural significance

The art of felting has been practiced for thousands of years, with evidence of felted textiles dating back to ancient times. Felted soap, however, is a relatively recent invention that has gained popularity in recent years.

The exact origins of felted soap are unclear, but it is believed to have originated in Japan. In Japan, there is a traditional craft called “nuno-zori” which involves felting wool onto sandals. It is thought that this technique was adapted to create felted soap.

Felted soap has since spread to other parts of the world and has become popular for its eco-friendly and aesthetic appeal. It is often handmade by artisans using natural materials and traditional felting techniques.

How to make your own felted soap at home

Making your own felted soap at home is a fun and creative project that allows you to customize the soap to your preferences. To make felted soap, you will need a few materials including a bar of soap, wool roving or yarn, hot water, and a towel.

Start by wrapping the wool tightly around the bar of soap, ensuring that it is completely covered. You can use different colors or types of wool to create unique designs or patterns. Once the wool is in place, wet it with hot water and gently massage it to create friction. This will cause the fibers to shrink and interlock together, creating a solid covering around the soap. Continue massaging until the wool feels firm and secure. Rinse the felted soap under cold water to remove any excess soap and squeeze out the excess water. Place it on a towel to dry.

The future of sustainable bathing and the role of felted soap in it

As the world becomes more aware of the environmental impact of plastic waste, sustainable bathing practices are gaining popularity. Felted soap is just one example of how individuals can make small changes in their daily routines to reduce waste and protect the environment.

The future of sustainable bathing lies in finding alternatives to single-use plastic products and embracing natural and biodegradable materials. Felted soap offers a simple yet effective solution that can be easily adopted by anyone.

By using felted soap, individuals can contribute to reducing plastic waste, conserving resources, and promoting a healthier planet. It is a small step towards a more sustainable future, but every small step counts.

Felted soap is an eco-friendly alternative to traditional soap bars that offers numerous benefits for both personal hygiene and the environment. By eliminating the need for plastic packaging and providing a natural and biodegradable option, felted soap helps reduce waste and protect the planet.

With its gentle exfoliation, luxurious lather, and customizable fragrances, felted soap offers a unique bathing experience that is both practical and enjoyable. It is suitable for all skin types, including those with sensitive skin or allergies.

As we look towards a more sustainable future, felted soap can play a significant role in reducing plastic waste and promoting eco-friendly practices. By making small changes in our daily routines, such as switching to felted soap, we can all contribute to creating a healthier planet for future generations. So why not give felted soap a try and join the movement towards plastic-free bathing?

If you’re interested in exploring more unique and creative ways to enhance your bathing experience, you might want to check out this article on haute couture by Structured Solutions. While it may seem unrelated at first, the artistry and attention to detail in haute couture can be compared to the craftsmanship behind felted soap. Both involve a meticulous process that results in a luxurious and personalized product. So, if you’re curious about the intersection of fashion and craftsmanship, this article is definitely worth a read. Click here to dive into the world of haute couture and discover the parallels it shares with the art of felted soap.

FAQs

What is felted soap?

Felted soap is a bar of soap that is wrapped in wool fibers and then felted together to create a natural, exfoliating washcloth.

What are the benefits of using felted soap?

Felted soap provides a gentle exfoliation while also creating a rich lather. The wool fibers also help to prolong the life of the soap by preventing it from becoming too soft or mushy.

How do you use felted soap?

To use felted soap, simply wet it and rub it between your hands or on a washcloth to create a lather. The wool fibers will gently exfoliate your skin as you wash.

Can felted soap be reused?

Yes, felted soap can be reused multiple times. Once the soap has been used up, the wool fibers can be cut off and composted or used for other crafts.

What types of soap can be used for felting?

Any type of soap can be used for felting, but harder soaps like castile or vegetable glycerin work best. Soaps with added moisturizers or oils may make the felting process more difficult.

Is felted soap eco-friendly?

Yes, felted soap is eco-friendly because it eliminates the need for a separate washcloth or loofah, reducing waste. The wool fibers used for felting are also biodegradable and can be composted.…

Photo Tailors ham - Sewing tool

Master the Art of Sewing with the Tailor’s Ham

The tailor’s ham is a versatile tool used in sewing and tailoring to shape and press fabric. It is a padded, firm, and rounded cushion that resembles the shape of a ham, hence the name. The tailor’s ham is an essential tool for achieving professional-looking garments and ensuring that seams, darts, and curves are pressed and shaped correctly.

The importance of the tailor’s ham in sewing cannot be overstated. It allows for precise shaping and pressing of fabric, which is crucial for achieving well-fitted garments. The tailor’s ham is particularly useful when working with curved seams, such as princess seams or armholes, as it provides a curved surface that mimics the body’s shape. This allows for accurate pressing and shaping of the fabric to ensure a perfect fit.

The history of the tailor’s ham can be traced back to traditional tailoring techniques. Tailors would use a ham made from scraps of fabric and stuffing to shape and press their garments. Over time, the tailor’s ham evolved into a specialized tool with specific features designed to aid in various sewing techniques. Today, the tailor’s ham is an indispensable tool for both professional tailors and home sewers alike.

Key Takeaways

  • The tailor’s ham is an essential tool for achieving professional-looking seams in sewing.
  • Understanding the different parts and functions of the tailor’s ham can help you choose the right one for your project.
  • When choosing a tailor’s ham, consider the type, size, and material that will work best for your fabric and pattern.
  • Properly preparing your fabric and pattern before cutting and marking can help you achieve better results with the tailor’s ham.
  • Using the tailor’s ham for pressing can help you achieve perfect seams, especially when working with difficult fabrics.

Understanding the Anatomy of the Tailor’s Ham: Different Parts and Functions.

The tailor’s ham consists of several different parts, each serving a specific function in sewing and tailoring. The main parts of the tailor’s ham include the body, the neck, and the point.

The body of the tailor’s ham is the largest part and is usually made from a sturdy fabric such as cotton or wool. It provides a firm surface for pressing and shaping fabric. The body is typically rounded on one side and flat on the other to accommodate different garment areas.

The neck of the tailor’s ham is a narrower section that connects the body to the point. It is used for pressing and shaping smaller areas, such as collars or cuffs. The neck is often tapered to allow for more precise pressing.

The point of the tailor’s ham is a small, rounded end that is used for pressing and shaping tight curves and corners. It is particularly useful for pressing darts or shaping sleeve caps. The point is usually made from a denser material, such as sawdust or wool, to provide more resistance and control.

To use each part effectively, it is important to understand their functions. The body of the tailor’s ham is used for pressing and shaping larger areas of fabric, such as seams or darts. The rounded side of the body is ideal for pressing curved seams, while the flat side is used for straight seams.

The neck of the tailor’s ham is used for pressing and shaping smaller areas, such as collars or cuffs. Its narrower shape allows for more precision when pressing these areas.

The point of the tailor’s ham is used for pressing and shaping tight curves and corners. It provides a concentrated area of pressure to ensure that these areas are properly shaped and pressed.

Choosing the Right Tailor’s Ham: Types, Sizes, and Materials.

When choosing a tailor’s ham, there are several factors to consider, including the type, size, and materials used.

There are different types of tailor’s hams available, each designed for specific purposes. The most common types include the regular tailor’s ham, the sleeve roll, and the seam roll.

The regular tailor’s ham is the most versatile type and can be used for a wide range of sewing techniques. It has a rounded body with a tapered neck and point.

The sleeve roll is specifically designed for pressing and shaping sleeves. It has a long, cylindrical shape that allows for easy insertion into sleeves.

The seam roll is used for pressing and shaping seams. It has a long, flat shape that is ideal for pressing open seams or shaping curved seams.

When it comes to size, tailor’s hams come in various dimensions to accommodate different garment areas. It is important to choose a size that matches the scale of your project. A larger tailor’s ham is suitable for pressing and shaping larger areas, while a smaller one is ideal for more intricate work.

The materials used in making tailor’s hams can vary. The body is typically made from a sturdy fabric such as cotton or wool, while the point is often made from a denser material such as sawdust or wool. Some tailor’s hams also have a heat-resistant cover to protect the fabric from scorching during pressing.

To choose the right tailor’s ham for your project, consider the type of sewing techniques you will be using and the size of the garment areas you will be working on. It is also important to consider the materials used in making the tailor’s ham to ensure its durability and effectiveness.

Preparing Your Fabric and Pattern: Tips for Cutting and Marking.

Topic Metric
Fabric Preparation Washing and Drying
Ironing and Pressing
Pattern Preparation Choosing the Right Size
Tracing and Cutting
Marking Techniques Using Tailor’s Tacks
Using Chalk or Marking Pens

Before you start sewing, it is important to properly prepare your fabric and pattern. This includes cutting and marking your fabric accurately to ensure that your garment pieces fit together correctly.

To cut your fabric, lay it out on a flat surface and smooth out any wrinkles or creases. Use sharp fabric scissors or a rotary cutter to cut along the pattern lines. Take care to cut accurately and follow the grainline indicated on the pattern.

To mark your fabric, use tailor’s chalk or fabric markers to transfer any pattern markings onto the fabric. This includes notches, darts, pleats, or any other design details. Make sure to mark these accurately to ensure that your garment pieces align correctly during sewing.

The tailor’s ham can be a useful tool when cutting and marking your fabric. When cutting, you can place the fabric on top of the rounded side of the tailor’s ham to provide a stable surface and prevent any distortion. This is particularly useful when cutting curved seams or bias-cut fabric.

When marking, you can use the tailor’s ham to shape and press darts or pleats. Place the fabric over the tailor’s ham and press along the marked lines to create crisp, defined folds. This will ensure that your darts or pleats are accurately shaped and pressed.

By properly preparing your fabric and pattern, and using the tailor’s ham effectively, you can ensure that your garment pieces are cut and marked accurately, resulting in a well-fitted and professional-looking garment.

Using the Tailor’s Ham for Pressing: Techniques for Achieving Perfect Seams.

Pressing is a crucial step in sewing that involves using heat and pressure to shape and set fabric. It helps to create crisp seams, smooth edges, and professional-looking garments. The tailor’s ham is an invaluable tool for achieving perfect seams.

To use the tailor’s ham for pressing, start by setting up your ironing board and iron. Make sure that your iron is set to the appropriate temperature for your fabric.

Place the fabric on top of the tailor’s ham, with the seam or area you want to press facing up. Use the rounded side of the tailor’s ham for curved seams or areas, and the flat side for straight seams.

Gently press the iron onto the fabric, applying even pressure. Move the iron along the seam or area, pressing as you go. Take care not to drag or slide the iron, as this can distort the fabric.

For curved seams, such as princess seams or armholes, use the rounded side of the tailor’s ham to shape and press the fabric. Place the fabric on top of the rounded side and press along the curve, using your fingers to guide and shape the fabric.

For straight seams, such as side seams or hems, use the flat side of the tailor’s ham to press the fabric. Place the fabric on top of the flat side and press along the seam, using your fingers to guide and shape the fabric.

By using the tailor’s ham effectively for pressing, you can achieve perfect seams that are well-shaped and pressed, resulting in a professional-looking garment.

Tailoring Techniques with the Tailor’s Ham: Shaping, Darts, and Curves.

Tailoring techniques are essential for achieving a well-fitted garment. The tailor’s ham can be a valuable tool when it comes to shaping, darts, and curves.

When shaping fabric, such as creating a curved seam or shaping a collar, the tailor’s ham can provide a curved surface that mimics the body’s shape. This allows for accurate pressing and shaping of the fabric to ensure a perfect fit.

To shape fabric using the tailor’s ham, place the fabric on top of the rounded side and press along the curve or area you want to shape. Use your fingers to guide and shape the fabric as you press.

Darts are another important tailoring technique that helps to create shape and contour in a garment. The tailor’s ham can be used to shape and press darts accurately.

To shape darts using the tailor’s ham, place the fabric on top of the rounded side and press along the dart lines. Use your fingers to guide and shape the fabric as you press. This will ensure that your darts are well-shaped and pressed, resulting in a garment that fits perfectly.

Curves, such as sleeve caps or armholes, can be challenging to sew and shape correctly. The tailor’s ham can help in shaping these curves accurately.

To shape curves using the tailor’s ham, place the fabric on top of the rounded side and press along the curve. Use your fingers to guide and shape the fabric as you press. This will ensure that your curves are well-shaped and pressed, resulting in a garment that fits comfortably.

By using the tailor’s ham effectively in tailoring techniques, you can achieve a well-fitted garment with accurately shaped and pressed seams, darts, and curves.

Advanced Sewing Techniques with the Tailor’s Ham: Pleats, Tucks, and Gathers.

Advanced sewing techniques, such as pleats, tucks, and gathers, can add interest and detail to your garments. The tailor’s ham can be a useful tool when it comes to these techniques.

Pleats are folds in fabric that are used to create fullness or shape. The tailor’s ham can help in shaping and pressing pleats accurately.

To shape pleats using the tailor’s ham, place the fabric on top of the rounded side and press along the pleat lines. Use your fingers to guide and shape the fabric as you press. This will ensure that your pleats are well-shaped and pressed, resulting in a garment with defined and crisp pleats.

Tucks are similar to pleats but are usually narrower and more closely spaced. The tailor’s ham can be used to shape and press tucks accurately.

To shape tucks using the tailor’s ham, place the fabric on top of the rounded side and press along the tuck lines. Use your fingers to guide and shape the fabric as you press. This will ensure that your tucks are well-shaped and pressed, resulting in a garment with neat and defined tucks.

Gathers are small, controlled folds of fabric that are used to create fullness or gather fabric into a smaller area. The tailor’s ham can help in shaping and pressing gathers accurately.

To shape gathers using the tailor’s ham, place the fabric on top of the rounded side and press along the gather lines. Use your fingers to guide and shape the fabric as you press. This will ensure that your gathers are well-shaped and pressed, resulting in a garment with even and controlled gathers.

By using the tailor’s ham effectively in advanced sewing techniques, you can add detail and interest to your garments with accurately shaped and pressed pleats, tucks, and gathers.

Sewing with Difficult Fabrics: How the Tailor’s Ham Can Help.

Sewing with difficult fabrics, such as slippery or delicate fabrics, can be challenging. The tailor’s ham can be a valuable tool when it comes to sewing with these fabrics.

When working with slippery fabrics, such as silk or satin, the tailor’s ham can provide stability and control. Place the fabric on top of the rounded side of the tailor’s ham to prevent it from sliding or shifting during sewing. This will ensure that your seams are sewn accurately and that the fabric is not distorted.

When working with delicate fabrics, such as lace or chiffon, the tailor’s ham can provide support and prevent damage. Place the fabric on top of the rounded side of the tailor’s ham to provide a stable surface for sewing. This will ensure that your fabric is not stretched or pulled during sewing, resulting in a garment that retains its shape and integrity.

By using the tailor’s ham effectively when sewing with difficult fabrics, you can overcome the challenges associated with these fabrics and achieve professional-looking results.

Cleaning and Maintaining Your Tailor’s Ham: Tips for Longevity.

To ensure the longevity of your tailor’s ham, it is important to clean and maintain it properly. Here are some tips for cleaning and maintaining your tailor’s ham:

– Regularly remove any dust or lint from your tailor’s ham by gently brushing or shaking it.
– If your tailor’s ham becomes soiled or stained, spot clean it using a mild detergent or soap. Gently scrub the affected area with a soft brush or cloth, then rinse thoroughly and air dry.
– Avoid submerging your tailor’s ham in water or machine washing it, as this can damage the materials and affect its shape.
– If your tailor’s ham becomes misshapen, reshape it by gently pressing and molding it back into its original form. You can also use steam to help reshape the ham.
– Store your tailor’s ham in a cool, dry place away from direct sunlight to prevent fading or discoloration.
– Avoid placing heavy objects on top of your tailor’s ham, as this can cause it to lose its shape or become compressed.

By following these tips, you can ensure that your tailor’s ham remains in good condition and lasts for many years of sewing and tailoring projects.

Mastering Sewing with the Tailor’s Ham.

In conclusion, the tailor’s ham is an essential tool in sewing and tailoring that allows for precise shaping and pressing of fabric. It is important to understand the different parts and functions of the tailor’s ham, as well as how to use each part effectively.

When choosing a tailor’s ham, consider the type, size, and materials used to ensure that it is suitable for your project. Properly preparing your fabric and pattern, and using the tailor’s ham effectively for cutting and marking, is crucial for achieving accurate and well-fitted garments.

The tailor’s ham is also invaluable for pressing, tailoring techniques, advanced sewing techniques, and sewing with difficult fabrics. By using the tailor’s ham effectively in these areas, you can achieve professional-looking results and overcome the challenges associated with sewing.

Finally, it is important to consider the long-term effects of our actions. While short-term gains may be tempting, we must think about the potential consequences that our decisions may have on ourselves, others, and the environment. By taking a moment to reflect on the potential outcomes, we can make more informed choices that align with our values and contribute to a sustainable future. It is crucial to prioritize the well-being of future generations and strive for actions that promote long-term benefits rather than immediate gratification.

If you’re interested in learning more about the world of tailoring and haute couture, you won’t want to miss this fascinating article on Structured Solutions’ website. In their piece titled “The Art of Haute Couture: A Journey into the World of Tailoring,” they delve into the intricate craftsmanship and meticulous attention to detail that goes into creating stunning garments. From the history of haute couture to the role of tailors in this industry, this article provides a comprehensive overview. Check it out here for an enlightening read.

FAQs

What is a tailor’s ham?

A tailor’s ham is a tool used in sewing and tailoring to help shape and press curved areas of a garment, such as darts, sleeves, and collars.

What is a tailor’s ham made of?

A tailor’s ham is typically made of tightly compressed sawdust or wool and covered in cotton or wool fabric.

How is a tailor’s ham used?

To use a tailor’s ham, the garment is placed over the ham and the curved area is pressed against the ham with an iron. This helps to shape and mold the fabric to the desired curve.

What are the benefits of using a tailor’s ham?

Using a tailor’s ham can help to create a more professional-looking garment by shaping and pressing curved areas. It can also help to prevent puckering and distortion in the fabric.

Can a tailor’s ham be used for any type of fabric?

A tailor’s ham can be used for a variety of fabrics, but it is most commonly used for wool, cotton, and other natural fibers. It may not be suitable for synthetic fabrics or delicate fabrics that require special care.

Where can I buy a tailor’s ham?

Tailor’s hams can be purchased at most fabric and sewing supply stores, as well as online retailers. They are available in a range of sizes and materials to suit different needs and preferences.…