Seam finishing is an essential part of any sewing project. It refers to the process of enclosing or securing the raw edges of a seam to prevent fraying and give the garment a clean and professional finish. Seam finishing not only enhances the durability of the garment but also improves its overall appearance.
In this blog post, we will explore the importance of seam finishing in sewing projects and discuss various types of seam finishes and when to use them. We will also provide step-by-step instructions for basic seam finishing techniques, tips for achieving professional-looking seams, and considerations for sewing with different fabrics. Additionally, we will troubleshoot common seam finishing problems and explore ways to embellish seams for a decorative touch. Finally, we will discuss the essential tools and equipment needed for seam finishing and provide tips for maintaining and caring for them.
Key Takeaways
- Perfectly finished seams are essential for achieving a professional-looking garment.
- There are various types of seam finishes, each suited for different fabrics and purposes.
- Basic techniques for seam finishing include zigzag stitching, overcasting, and binding.
- Tips for achieving professional-looking seams include using the right needle and thread, and pressing the seams properly.
- When sewing with different fabrics, it’s important to consider the appropriate seam finishing technique to prevent fraying and unraveling.
Understanding the Importance of Seam Finishing
Seam finishing is not just a cosmetic step in sewing; it has several benefits that contribute to the overall quality and longevity of a garment. Firstly, it prevents the fabric from fraying, which can lead to unraveling and deterioration over time. By enclosing or securing the raw edges of a seam, you ensure that the fabric remains intact and doesn’t fray.
Secondly, seam finishing improves the appearance of the garment. A well-finished seam gives a polished and professional look to the inside of the garment, making it look as good on the inside as it does on the outside. This attention to detail adds value to your sewing projects and sets them apart from store-bought garments.
On the other hand, poorly finished seams can have negative consequences. They can lead to fraying, which not only compromises the durability of the garment but also creates an untidy and unprofessional appearance. Poorly finished seams can also cause discomfort when worn, as rough edges can irritate the skin.
Types of Seam Finishes and When to Use Them
There are various types of seam finishes, each suitable for different fabrics and sewing projects. Some common types of seam finishes include zigzag stitch, overlock stitch, and French seam.
The zigzag stitch is a versatile seam finish that can be used on a wide range of fabrics. It is particularly useful for preventing fraying on woven fabrics. The zigzag stitch creates a zigzag pattern along the raw edge of the fabric, securing it and preventing fraying.
The overlock stitch, also known as a serged edge, is commonly used on knit fabrics. It not only prevents fraying but also provides a clean and professional finish. The overlock stitch is created using a serger machine, which trims the fabric edge while simultaneously stitching it.
The French seam is a more advanced seam finishing technique that is ideal for lightweight and delicate fabrics. It involves enclosing the raw edges of the fabric within the seam itself, resulting in a neat and clean finish on both the inside and outside of the garment.
When choosing a seam finish, consider the fabric type, garment style, and desired level of durability and appearance. For example, if you are working with a lightweight silk fabric for a delicate blouse, a French seam would be the best choice to achieve a clean and elegant finish. On the other hand, if you are sewing activewear made from stretchy knit fabric, an overlock stitch would provide both durability and a professional look.
Basic Techniques for Seam Finishing
| Technique | Description | Pros | Cons |
|---|---|---|---|
| Zigzag stitch | A back-and-forth stitch that creates a zigzag pattern along the edge of the fabric. | Quick and easy to do, works well on stretchy fabrics. | May not be as durable as other techniques, can cause fabric to pucker if not done correctly. |
| French seam | A two-step seam that encloses the raw edge of the fabric within the seam itself. | Creates a clean and professional finish, works well on lightweight fabrics. | Can be time-consuming, may not work well on thicker fabrics. |
| Bound seam | A seam that is finished by encasing the raw edge of the fabric within bias tape or a similar binding material. | Creates a neat and tidy finish, works well on fabrics that fray easily. | Can be time-consuming, may add bulk to the seam. |
| Overlock stitch | A stitch that sews over the edge of the fabric, enclosing it within a thread casing. | Creates a durable and professional finish, works well on a variety of fabrics. | Requires a serger or overlock machine, may be difficult to do on curved edges. |
Now that we have discussed different types of seam finishes, let’s dive into some basic techniques for achieving perfectly finished seams. These techniques can be used with various types of seam finishes and are suitable for both beginners and experienced sewists.
1. Zigzag Stitch:
– Set your sewing machine to the zigzag stitch setting.
– Sew along the raw edge of the fabric, making sure that the zigzag stitches catch the raw edge.
– Trim any excess fabric close to the zigzag stitches.
2. Overlock Stitch:
– Use a serger machine with the appropriate thread and settings for your fabric.
– Align the raw edge of the fabric with the serger blade and foot.
– Sew along the raw edge, allowing the serger to trim and stitch simultaneously.
3. French Seam:
– With wrong sides together, sew a narrow seam along the raw edge of the fabric.
– Trim the seam allowance to about 1/8 inch.
– Press the seam open and fold the fabric so that right sides are together.
– Sew a second seam, enclosing the raw edges within the seam.
When using these techniques, it is important to have the right tools and equipment. For example, a sewing machine with adjustable stitch settings is necessary for creating zigzag stitches. A serger machine is required for overlock stitches. Additionally, sharp scissors or rotary cutters are essential for trimming fabric edges, and an iron is necessary for pressing seams.
To achieve clean and professional-looking seams, here are some tips to keep in mind:
– Always start with a clean and well-prepared fabric. Remove any loose threads or excess fabric before sewing.
– Take your time and sew slowly, especially when working with delicate fabrics or intricate seam finishes.
– Press your seams after each step to ensure they lay flat and look neat.
– Use quality thread that matches your fabric to ensure durability and a seamless finish.
Tips for Achieving Professional-Looking Seams
While we have discussed some general tips for achieving professional-looking seams in the previous section, let’s delve deeper into common mistakes to avoid when seam finishing and how to troubleshoot common problems that may arise.
One common mistake when seam finishing is not paying attention to seam allowances. Seam allowances refer to the amount of fabric between the stitching line and the raw edge of the fabric. It is important to maintain consistent and even seam allowances throughout your project to ensure a professional finish. Use a seam gauge or ruler to measure and mark your seam allowances before sewing.
Another mistake to avoid is using the wrong needle and thread for your fabric. Different fabrics require different types of needles and threads. For example, lightweight fabrics like silk or chiffon require a fine needle and lightweight thread, while heavyweight fabrics like denim require a stronger needle and thicker thread. Using the wrong needle or thread can result in skipped stitches, broken threads, or puckering.
If you encounter fraying along the raw edges of your seams, it may be due to a few reasons. Firstly, the stitch length may be too long, causing the fabric to fray. Try reducing the stitch length to secure the fabric more effectively. Secondly, the tension on your sewing machine may be too loose. Adjust the tension settings to ensure that the stitches are tight and secure.
Puckering is another common problem that can occur when sewing seams. Puckering refers to the gathering or wrinkling of fabric along the seam line. This can happen if the tension on your sewing machine is too tight or if you are pulling the fabric too tightly as you sew. Adjust the tension settings and sew with a relaxed hand to prevent puckering.
If you encounter any of these problems, don’t panic! Take a step back, assess the issue, and make adjustments as needed. It may take some trial and error to find the right settings and techniques for your specific project, but with practice, you will become more confident in achieving professional-looking seams.
Sewing with Different Fabrics: Seam Finishing Considerations
When it comes to seam finishing, different fabrics require different approaches. Delicate fabrics like silk, chiffon, or lace require extra care and attention to achieve clean and professional-looking seams.
When working with delicate fabrics, it is important to choose a seam finish that will not add bulk or weigh down the fabric. French seams are often the best choice for lightweight fabrics, as they enclose the raw edges within the seam, resulting in a clean and elegant finish. Another option is to use a narrow rolled hem, which creates a delicate and lightweight edge.
When sewing with stretchy fabrics like jersey or spandex, it is important to choose a seam finish that will accommodate the fabric’s stretch. An overlock stitch or a stretch stitch on your sewing machine is ideal for these fabrics, as they provide both durability and flexibility.
In addition to choosing the right seam finish, it is important to select the appropriate needle and thread for your fabric. For delicate fabrics, use a fine needle and lightweight thread to prevent damage or distortion. For stretchy fabrics, use a ballpoint needle and stretch thread to ensure that the seams can withstand the fabric’s stretch.
Troubleshooting Common Seam Finishing Problems

Even with careful attention to detail, seam finishing problems can still occur. Here are some common problems you may encounter when seam finishing and how to troubleshoot them:
1. Skipped Stitches:
– Ensure that you are using the correct needle for your fabric. A dull or bent needle can cause skipped stitches.
– Check that your needle is inserted correctly and securely in the machine.
– Adjust the tension settings on your sewing machine. Skipped stitches can occur if the tension is too tight or too loose.
2. Uneven Tension:
– Check that your sewing machine is threaded correctly. Uneven tension can occur if the thread is not properly threaded through the machine.
– Adjust the tension settings on your sewing machine. If one side of the seam appears tighter or looser than the other, you may need to adjust the tension accordingly.
3. Uneven Seam Allowances:
– Use a seam gauge or ruler to measure and mark your seam allowances before sewing. This will ensure that your seams are consistent and even.
– Sew slowly and carefully, paying attention to the fabric as it feeds through the machine. If you notice that the fabric is shifting or bunching, adjust your sewing speed or use a fabric stabilizer to prevent distortion.
If you are unable to troubleshoot the problem on your own, don’t hesitate to seek professional help. A sewing machine technician or experienced sewist may be able to identify and fix the issue.
Embellishing Seams: Adding a Decorative Touch
Seam finishing doesn’t have to be limited to functional purposes; it can also be an opportunity to add a decorative touch to your sewing projects. Embellishing seams can elevate the overall look of a garment and make it truly unique.
There are various ways to embellish seams, depending on your personal style and the desired effect. Some common techniques include piping, topstitching, and decorative stitches.
Piping involves inserting a narrow strip of fabric or cord between two layers of fabric before sewing the seam. This creates a raised and decorative edge along the seam line. Piping can be used on collars, cuffs, or any other seam where you want to add a pop of color or texture.
Topstitching is another way to embellish seams. It involves stitching along the edge of a seam, either on the right side or wrong side of the fabric, to secure the seam allowance in place and add visual interest. Topstitching can be done with a straight stitch or decorative stitch, depending on the desired effect.
Decorative stitches can also be used to embellish seams. Many modern sewing machines come with built-in decorative stitches that can be used for this purpose. These stitches can add intricate patterns or designs along the seam line, making your garment truly unique.
When choosing an embellishment for your project, consider the fabric type, garment style, and overall aesthetic. For example, if you are sewing a bohemian-style blouse, you may opt for a decorative stitch that adds a whimsical touch to the seams. On the other hand, if you are sewing a tailored jacket, piping along the collar and cuffs can add a sophisticated and polished look.
Seam Finishing Tools and Equipment
To achieve perfectly finished seams, it is important to have the right tools and equipment. Here is an overview of essential tools and equipment for seam finishing:
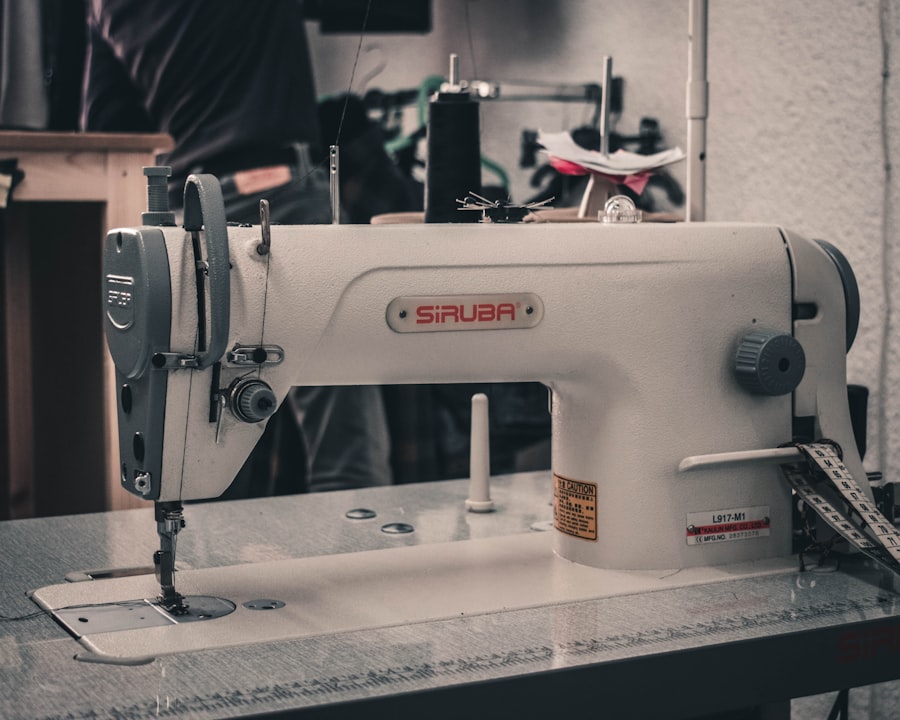
1. Sewing Machine:
– Choose a sewing machine with adjustable stitch settings to accommodate different types of seam finishes.
– Look for a machine with a built-in overlock stitch or consider investing in a serger machine for more professional-looking finishes.
2. Needles:
– Use the appropriate needle for your fabric type. For example, use a ballpoint needle for knit fabrics and a sharp needle for woven fabrics.
– Replace your needles regularly to ensure clean and precise stitching.
3. Thread:
– Choose thread that matches your fabric in color and weight.
– Consider using specialty threads like polyester or cotton-wrapped polyester for added strength and durability.
4. Scissors or Rotary Cutters:
– Use sharp scissors or rotary cutters to trim fabric edges and thread.
– Invest in quality cutting tools to ensure clean and precise cuts.
5. Seam Gauge or Ruler:
– Use a seam gauge or ruler to measure and mark your seam allowances before sewing.
– This will help you achieve consistent and even seams throughout your project.
6. Iron:
– Pressing your seams is an essential step in achieving professional-looking finishes.
– Use an iron with adjustable heat settings to accommodate different fabric types.
To maintain and care for your tools, follow these tips:
– Clean your sewing machine regularly to remove lint and debris that can affect its performance.
– Oil your sewing machine as recommended by the manufacturer to keep it running smoothly.
– Keep your scissors or rotary cutters sharp by regularly sharpening or replacing the blades.
– Store your tools in a clean and dry environment to prevent rust or damage.
Mastering the Art of Perfectly Finished Seams
Seam finishing is an important step in any sewing project, as it not only enhances the durability of the garment but also improves its overall appearance. By understanding the importance of seam finishing, learning different types of seam finishes, and mastering basic techniques, you can achieve professional-looking seams in your sewing projects.
Remember to choose the appropriate seam finish for your fabric type and garment style, and always use the right tools and equipment for the job. Pay attention to seam allowances, needle and thread selection, and pressing techniques to ensure clean and precise seams.
Don’t be afraid to experiment with different seam finishes and embellishments to add a personal touch to your sewing projects. With practice and attention to detail, you can master the art of perfectly finished seams and take your sewing skills to the next level. So go ahead, start practicing, and enjoy the satisfaction of creating beautifully finished garments!
If you’re looking to perfect your sewing skills, you’ll definitely want to check out this informative article on how to finish a sewing seam. It provides step-by-step instructions and helpful tips to ensure your seams are clean and professional-looking. For more valuable resources on organization and productivity, be sure to explore Structured Solutions’ article on the organization journey. And if you’re interested in connecting with their team or have any questions, don’t hesitate to reach out through their message our team page. Happy sewing!
FAQs
What is a sewing seam?
A sewing seam is the line where two pieces of fabric are joined together by stitching.
Why is it important to finish a sewing seam?
Finishing a sewing seam prevents the fabric from fraying and unraveling over time, which can weaken the seam and cause it to come apart.
What are some common ways to finish a sewing seam?
Some common ways to finish a sewing seam include using a zigzag stitch, overlock stitch, or serger machine. You can also use binding, bias tape, or a French seam.
How do I choose the best finishing method for my sewing project?
The best finishing method for your sewing project will depend on the type of fabric you are using, the type of seam you have sewn, and the overall look you want to achieve. Experiment with different methods on scrap fabric to find the one that works best for your project.
What tools do I need to finish a sewing seam?
You will need a sewing machine or serger machine, thread, and scissors. Depending on the finishing method you choose, you may also need binding, bias tape, or a seam ripper.
Can I finish a sewing seam by hand?
Yes, you can finish a sewing seam by hand using a whip stitch or blanket stitch. This method is often used for delicate fabrics or when a machine is not available.